Quick heads-up: This post contains a few affiliate links, which means I may earn a small commission if you make a purchase — at no extra cost to you. I only promote products that I believe in and would use myself.
“HOW do you get to travel so much?!”
I get that question a lot.
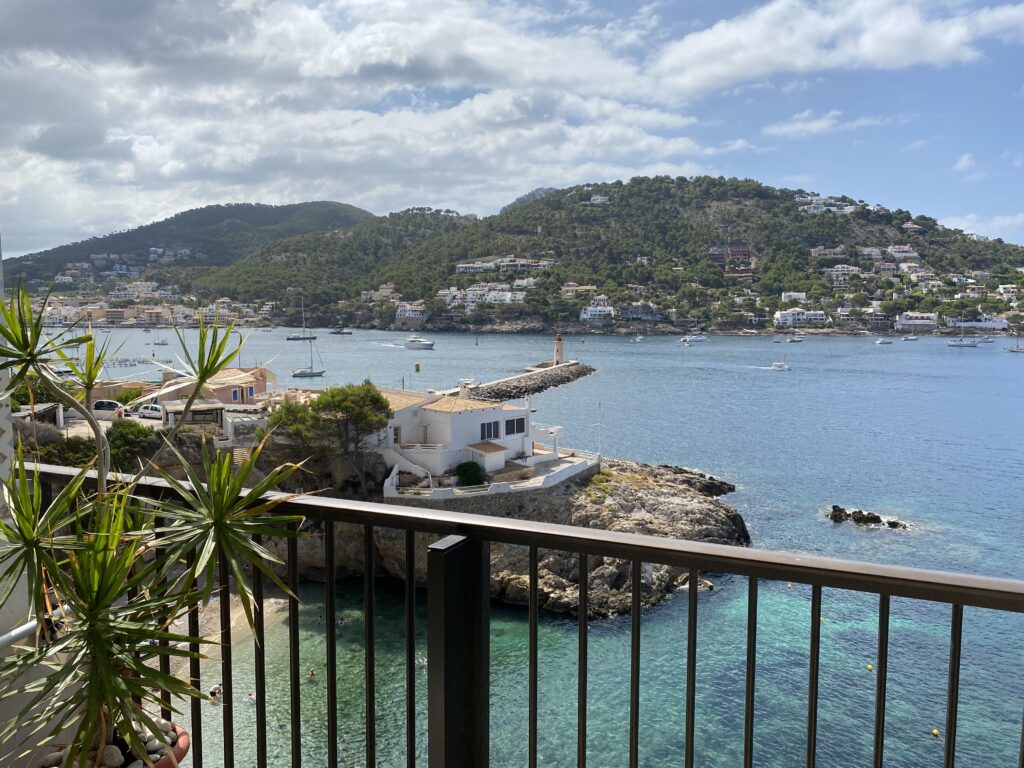
Since 2017, I’ve lived and worked from places like:
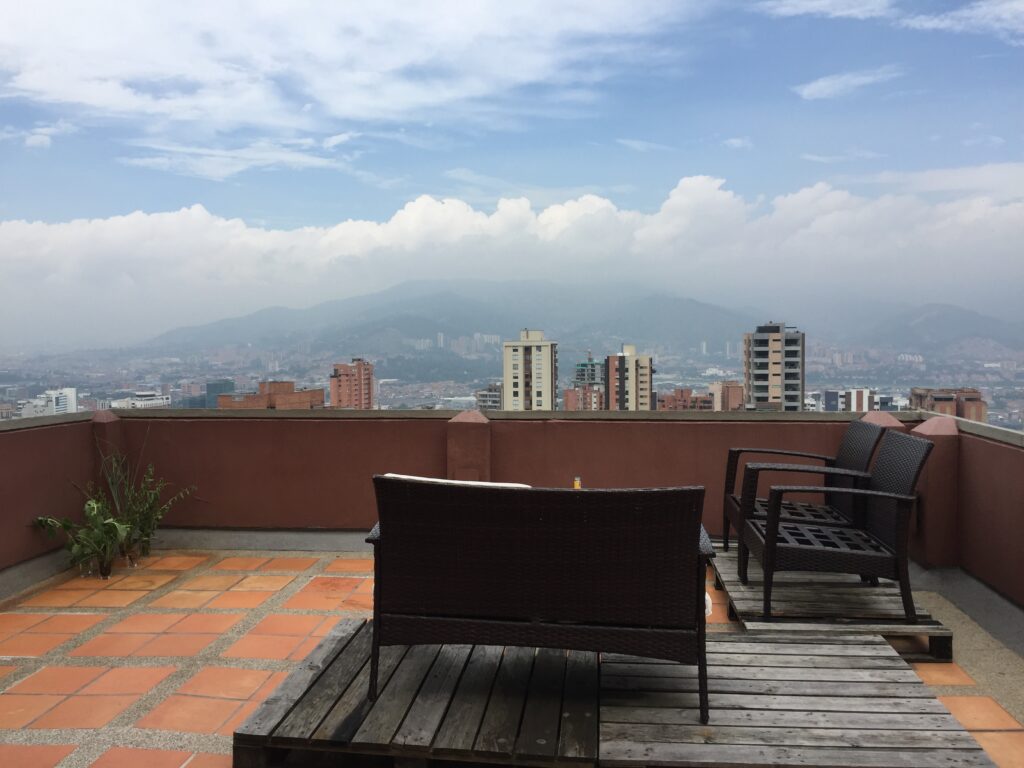
- Medellin, Colombia
- Bali, Indonesia
- Phuket, Thailand
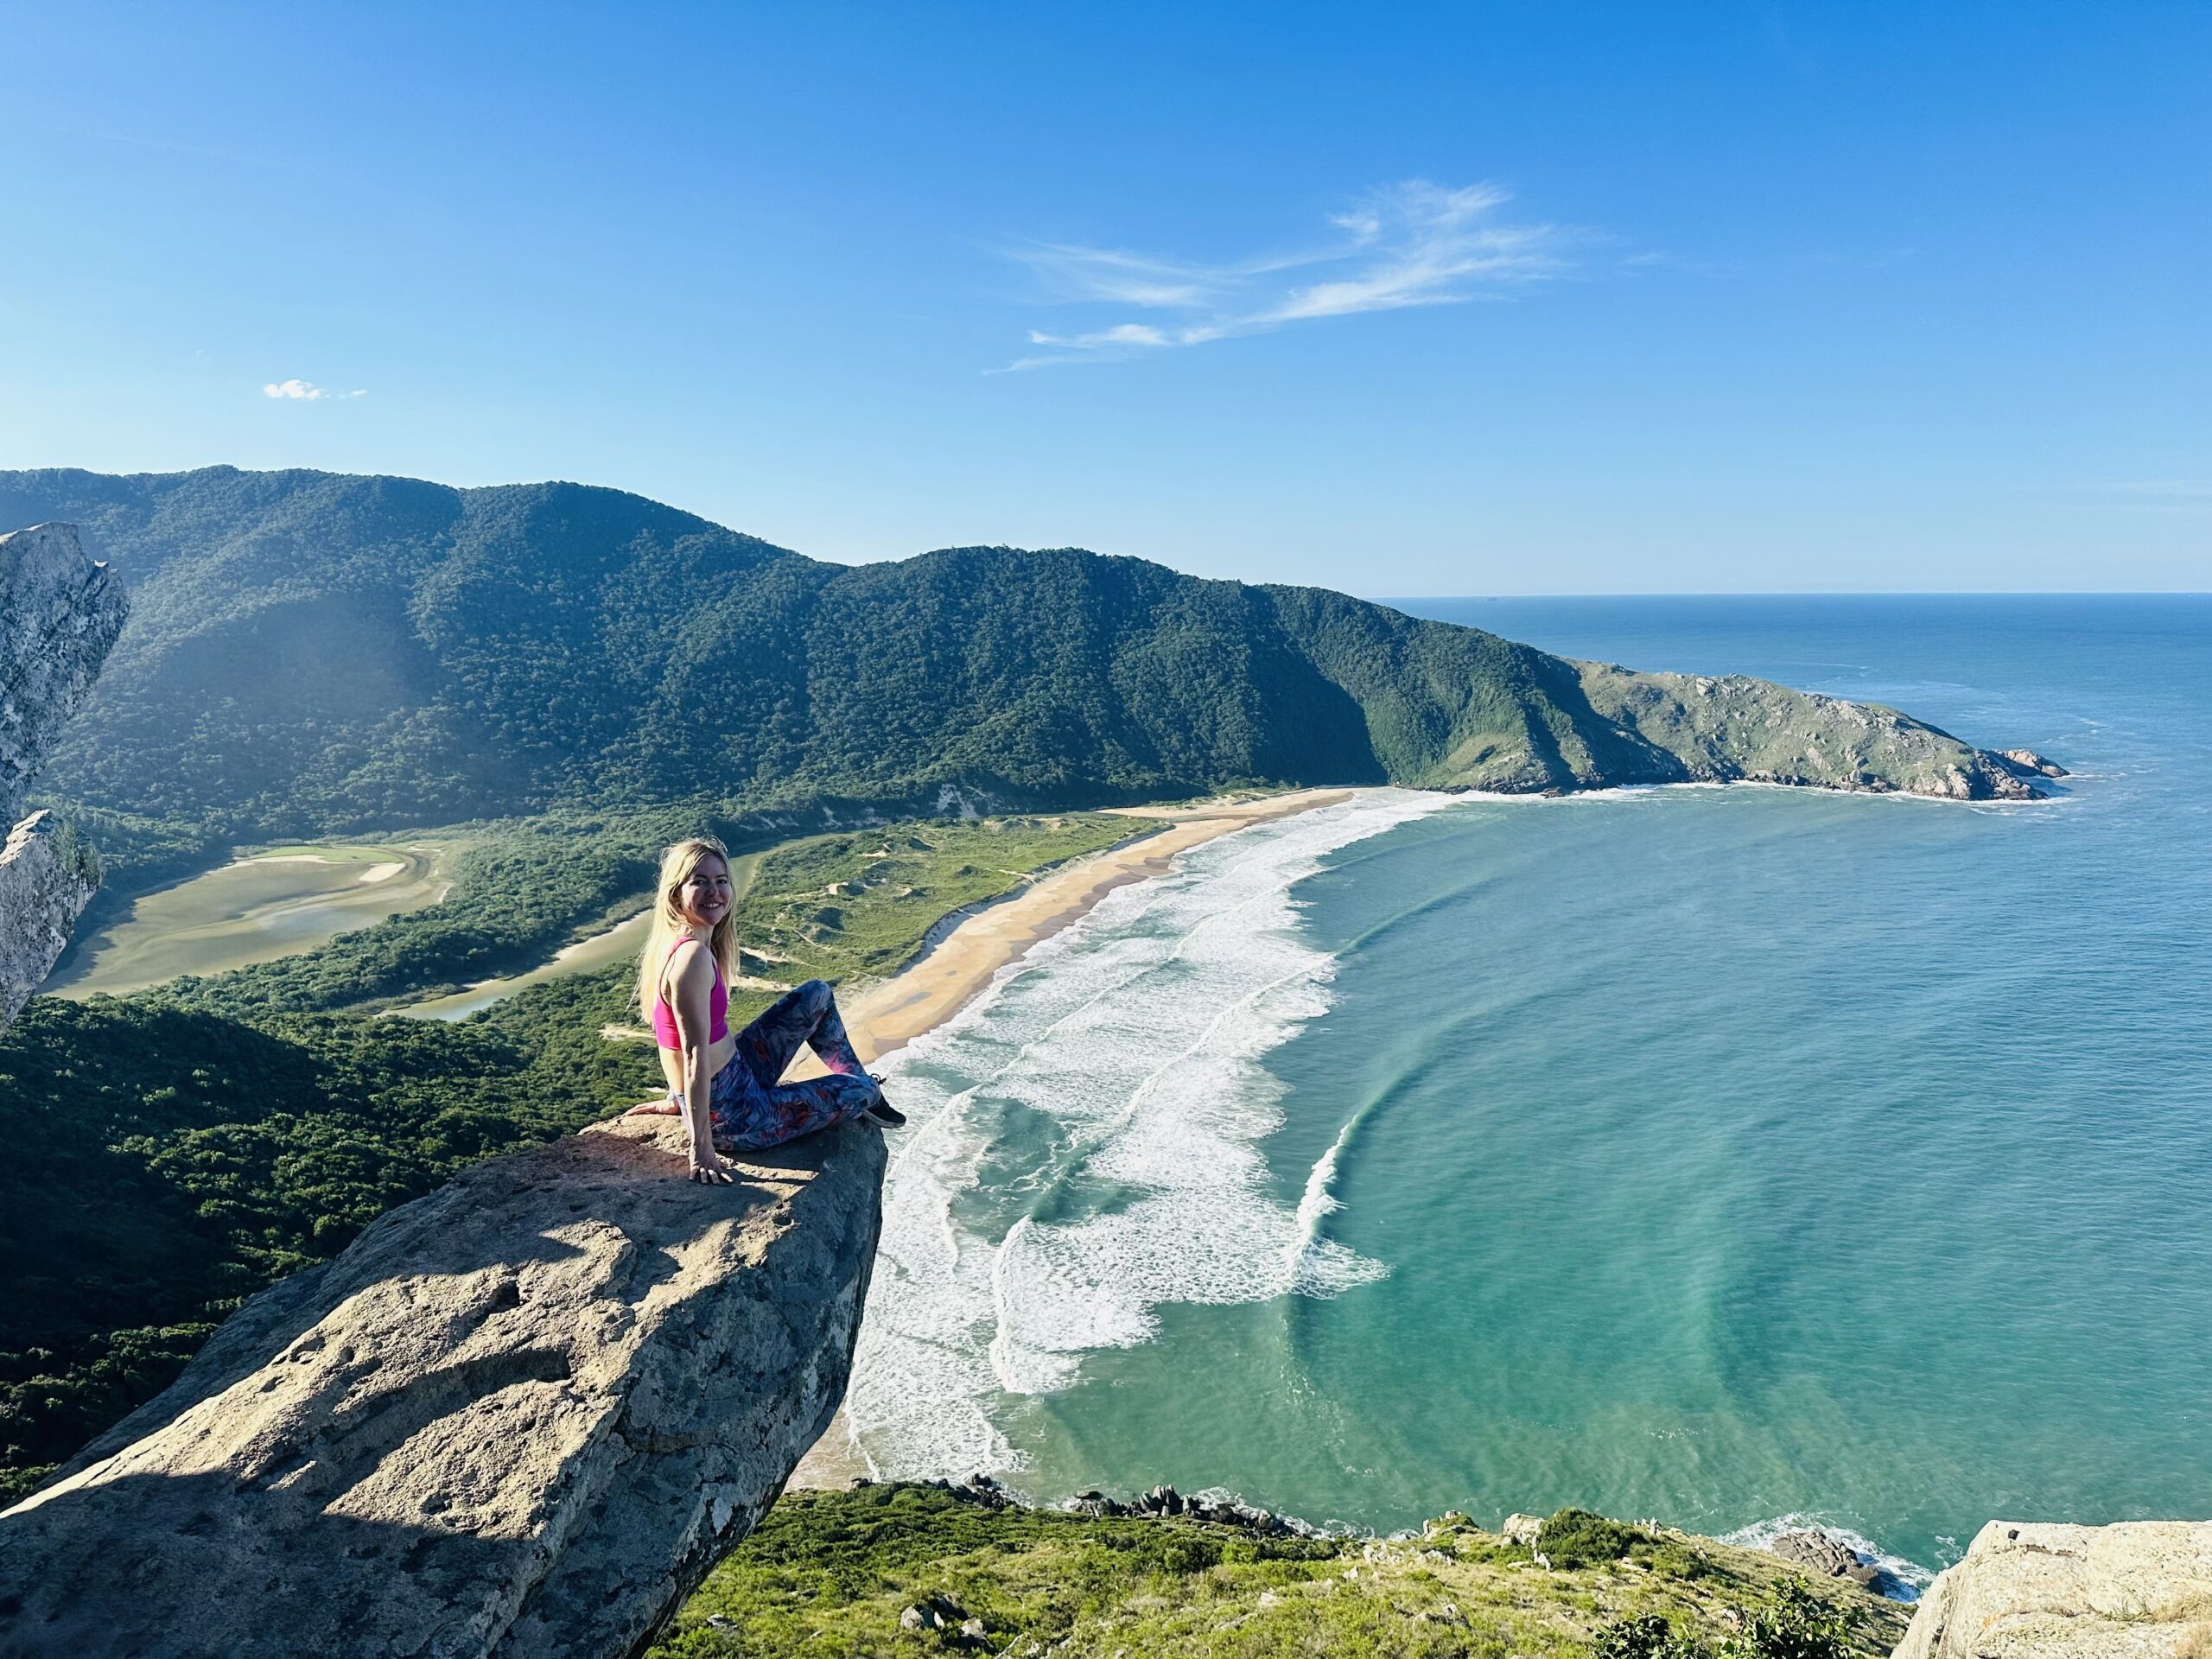
- Florianopolis, Brazil
- Dominical, Costa Rica
- Copenhagen, Denmark
- The Maldives
…And so much more. I’ve also become a permanent resident of Spain, making Barcelona my home half the year. I normally spend the rest of the year traveling.
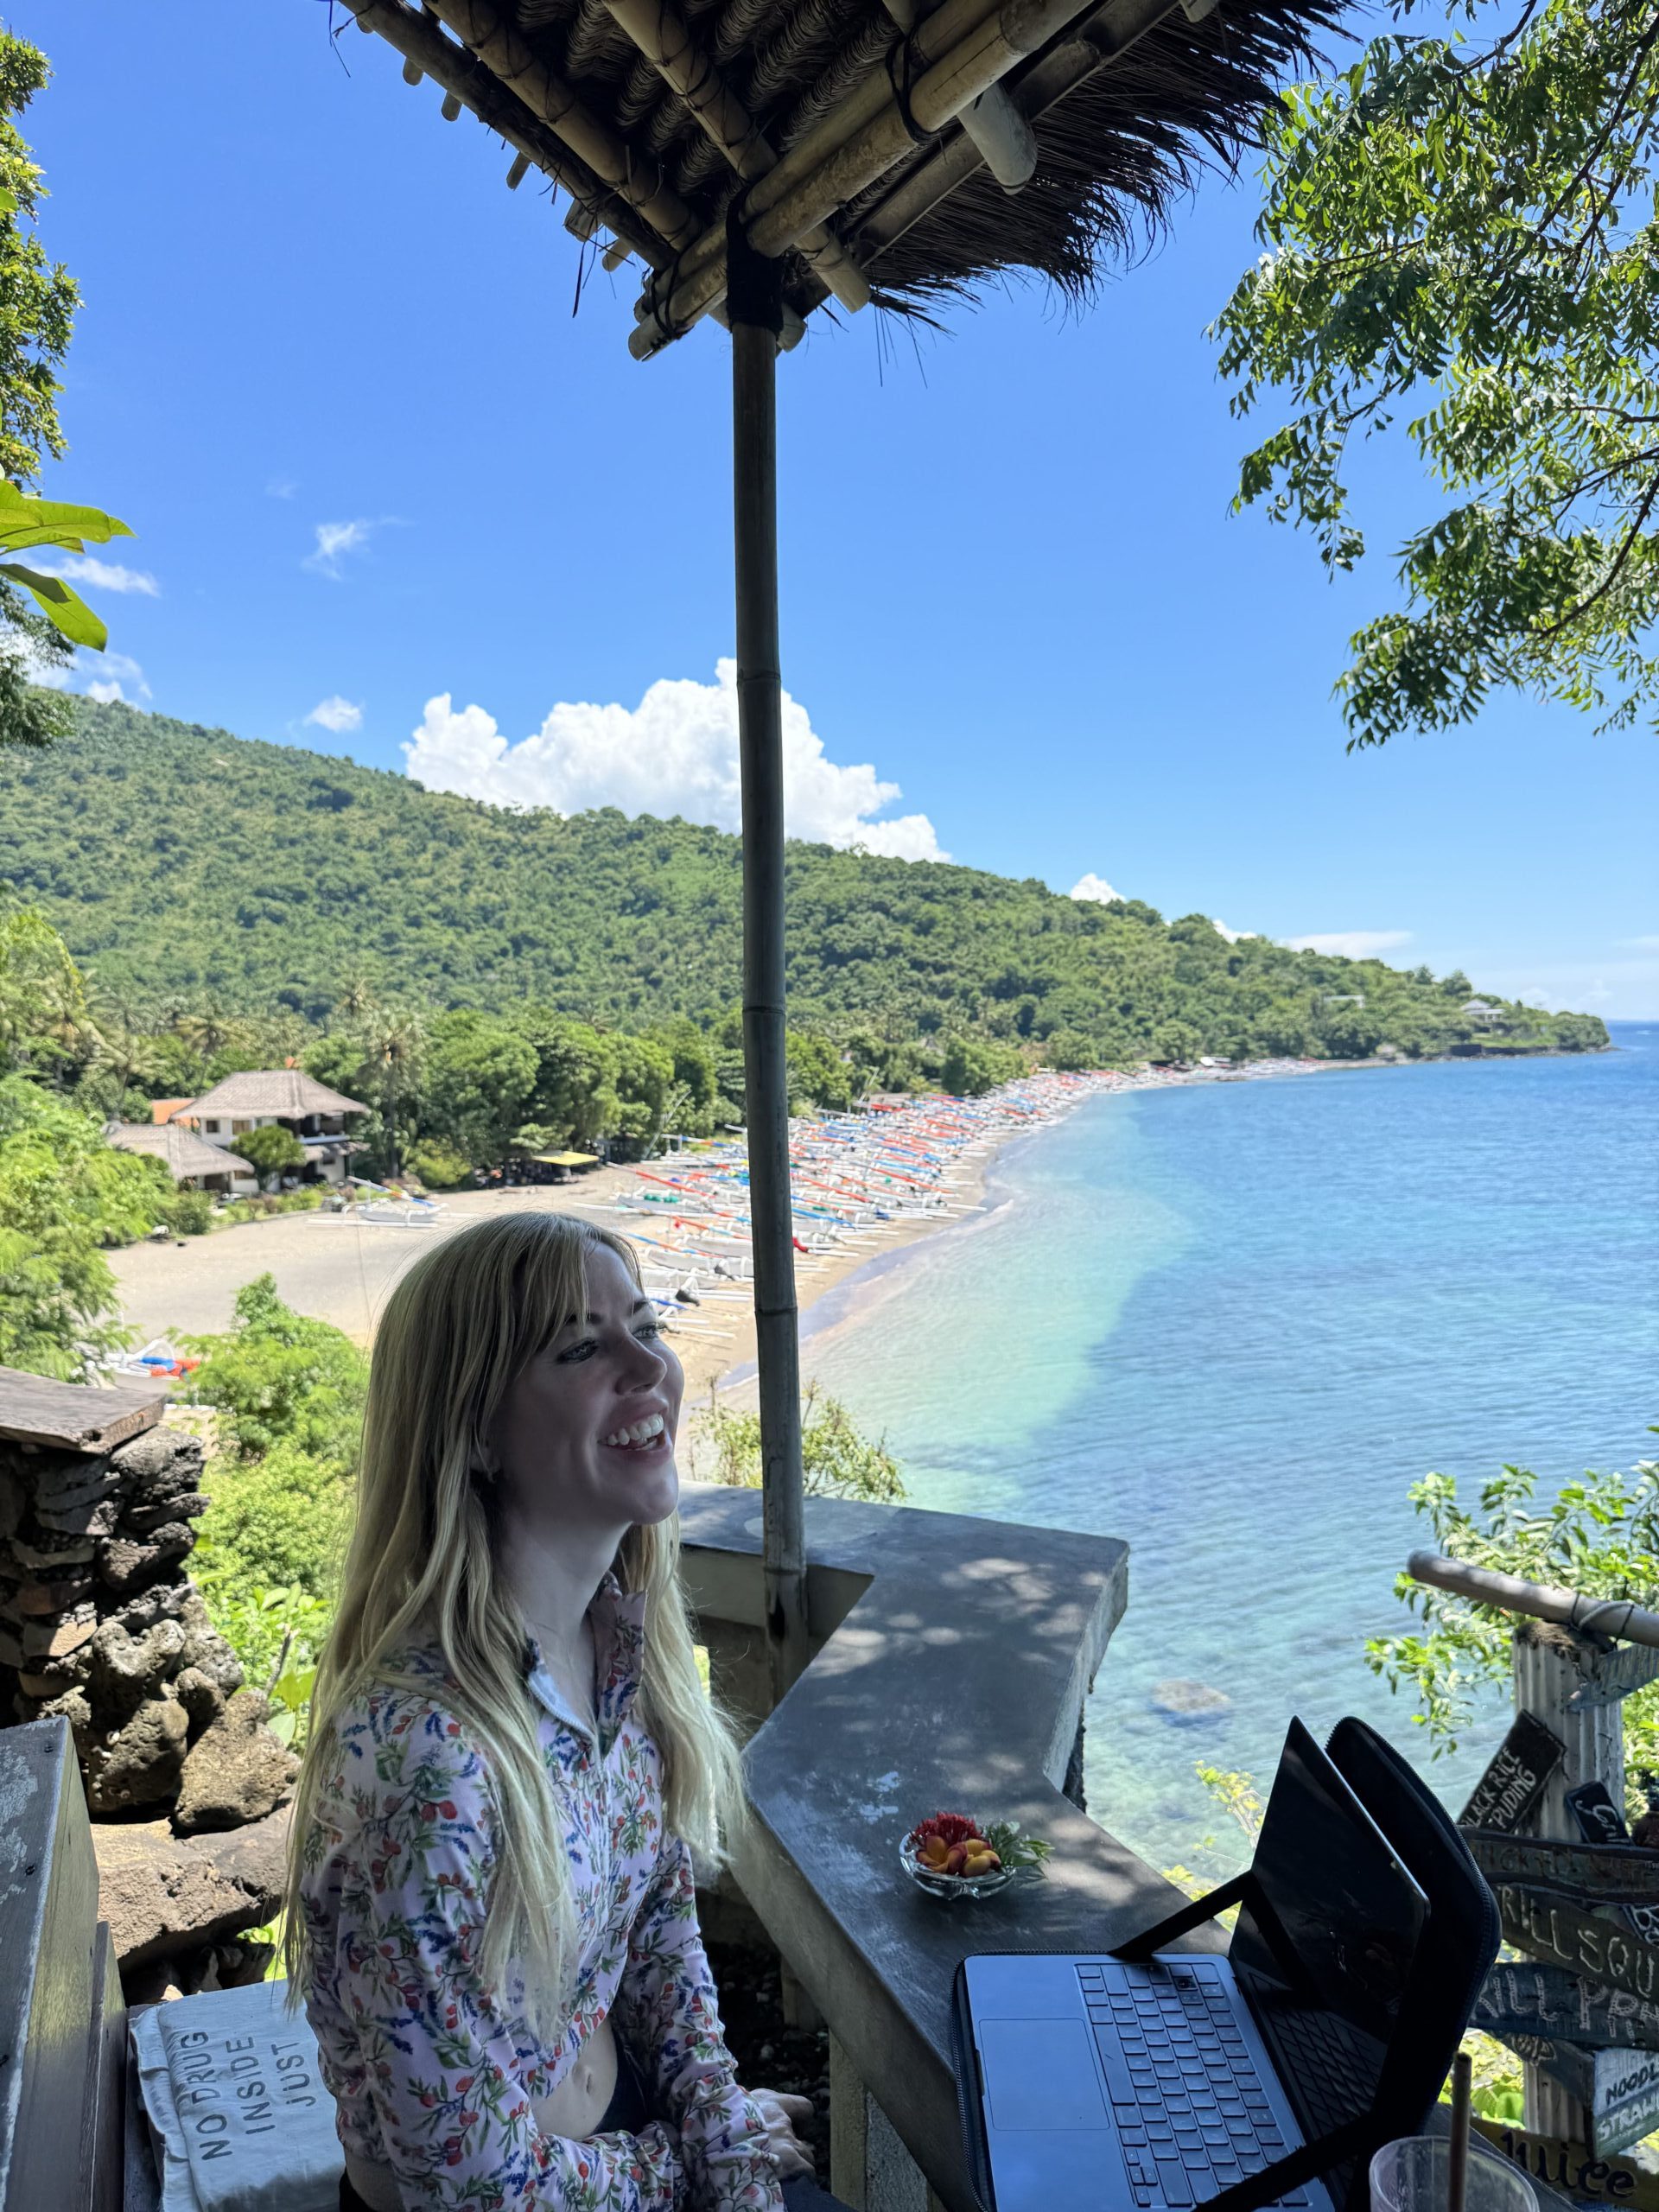
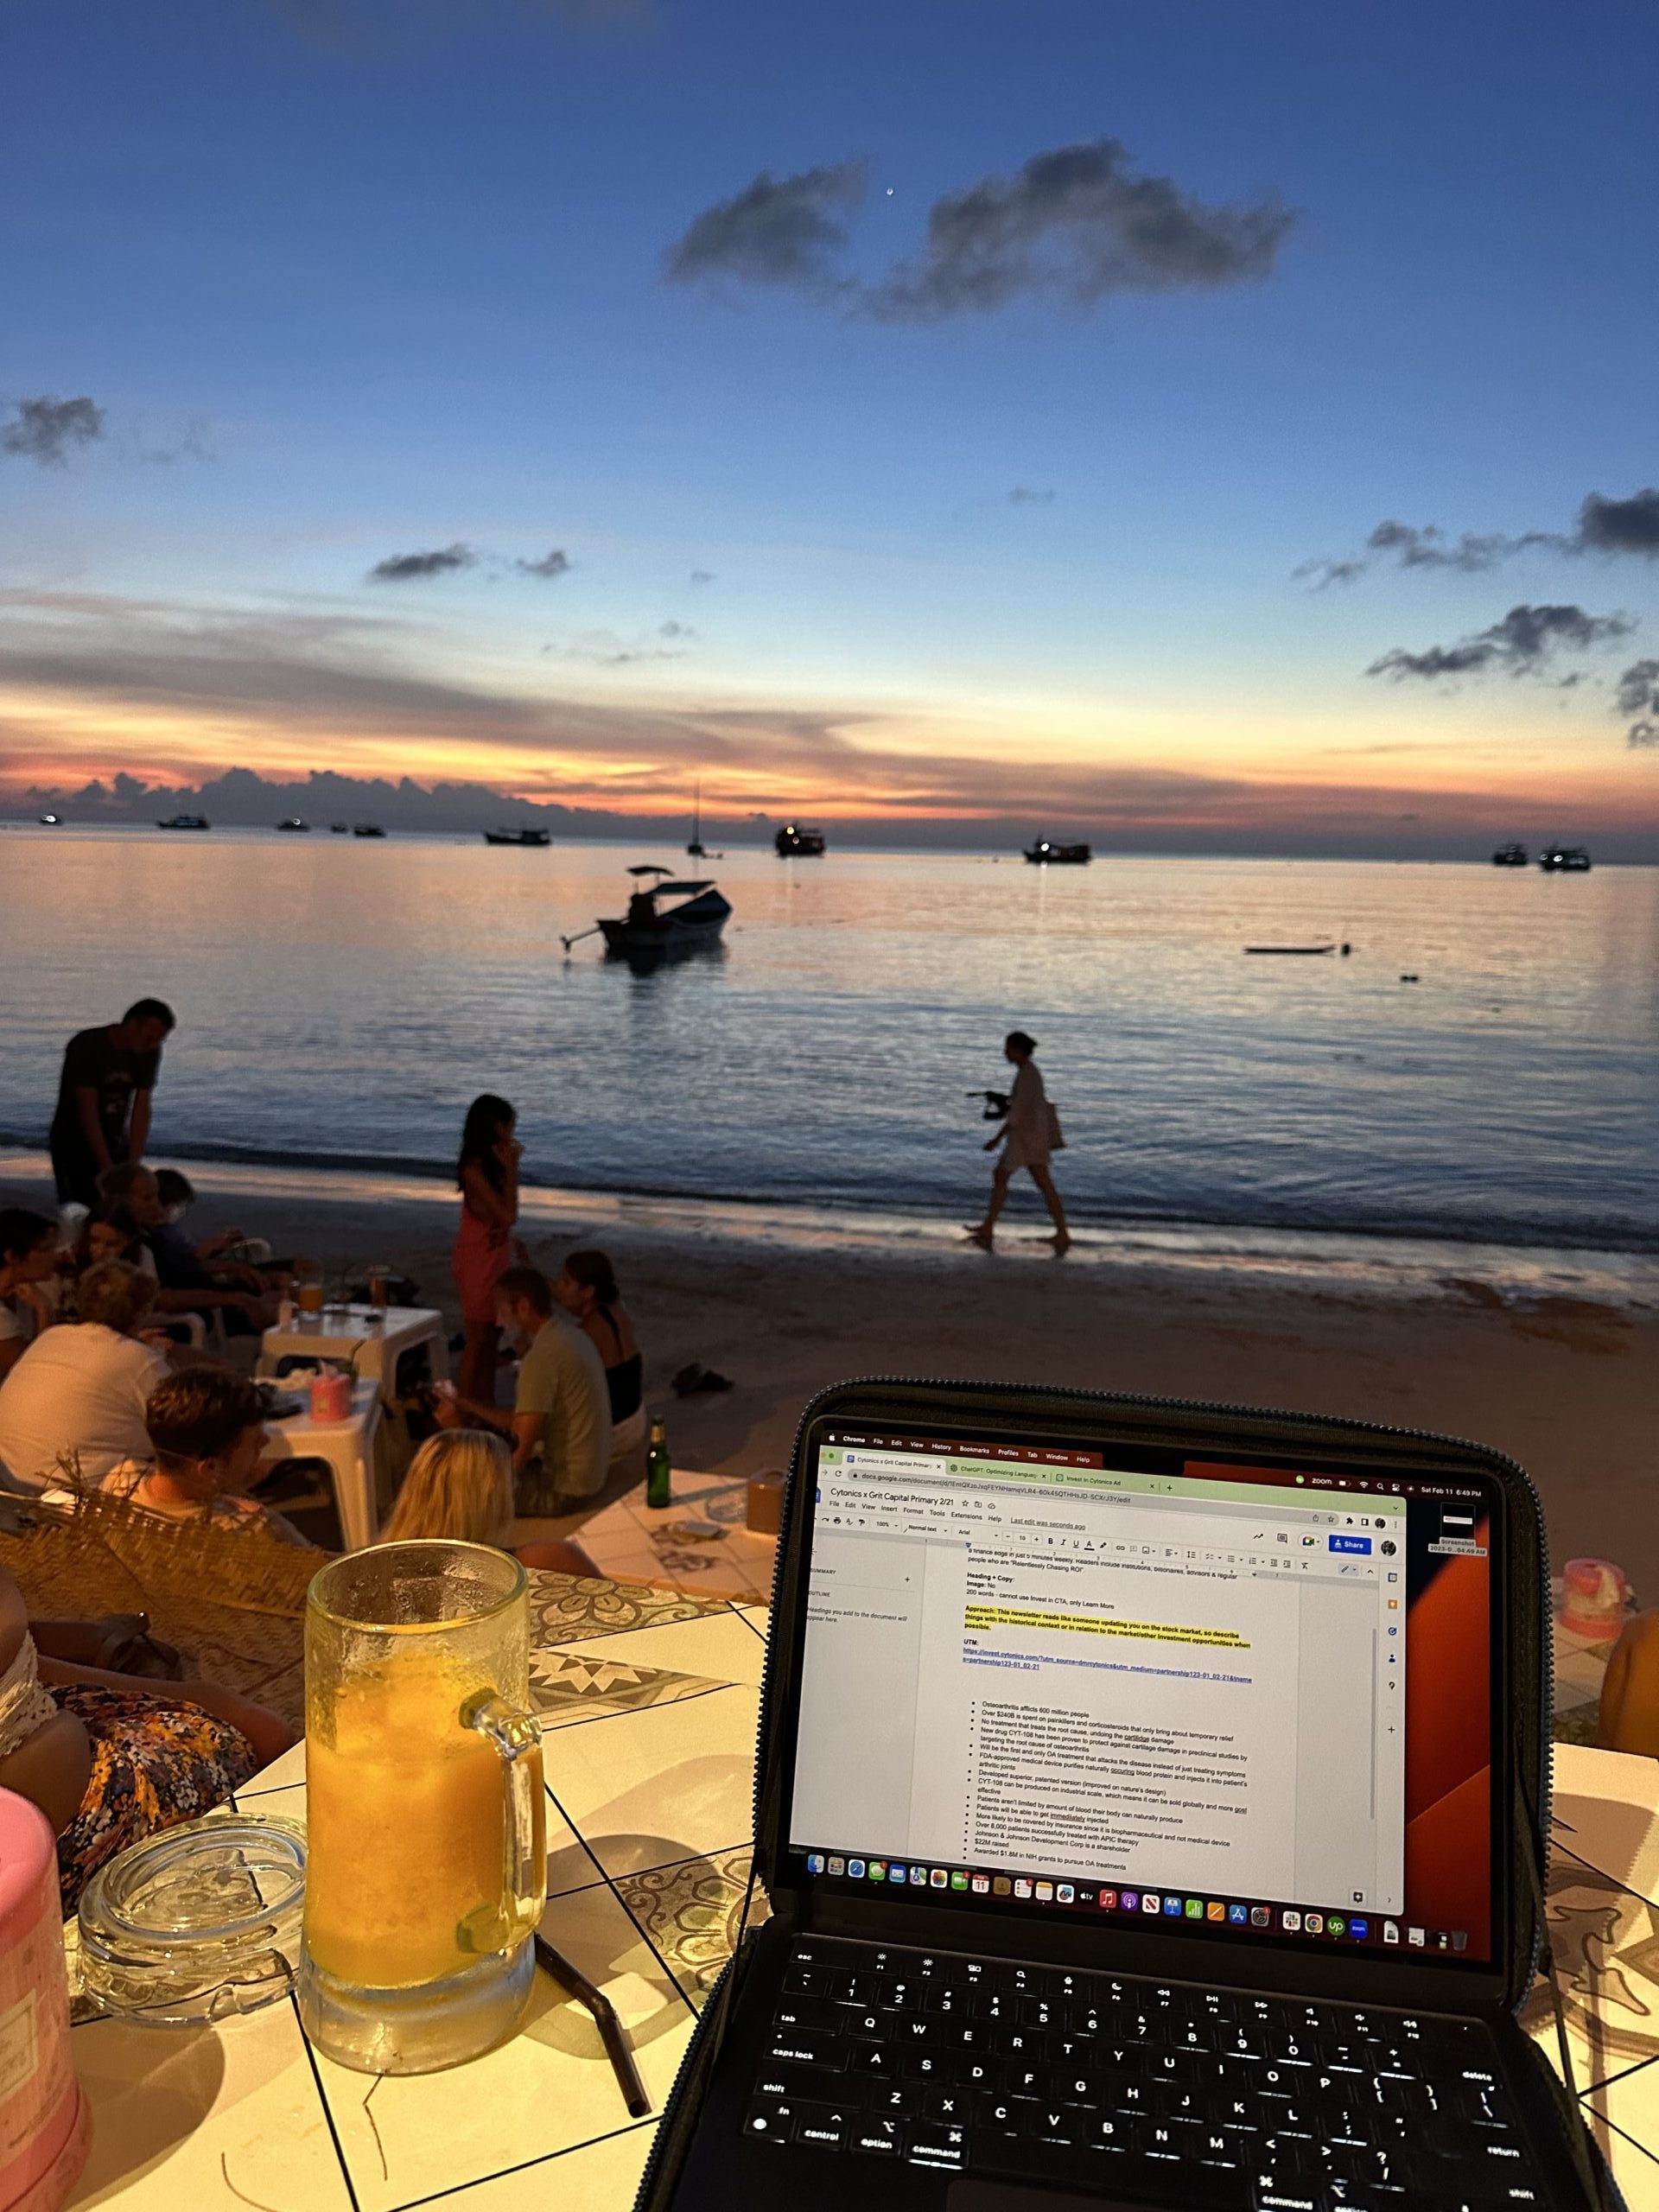
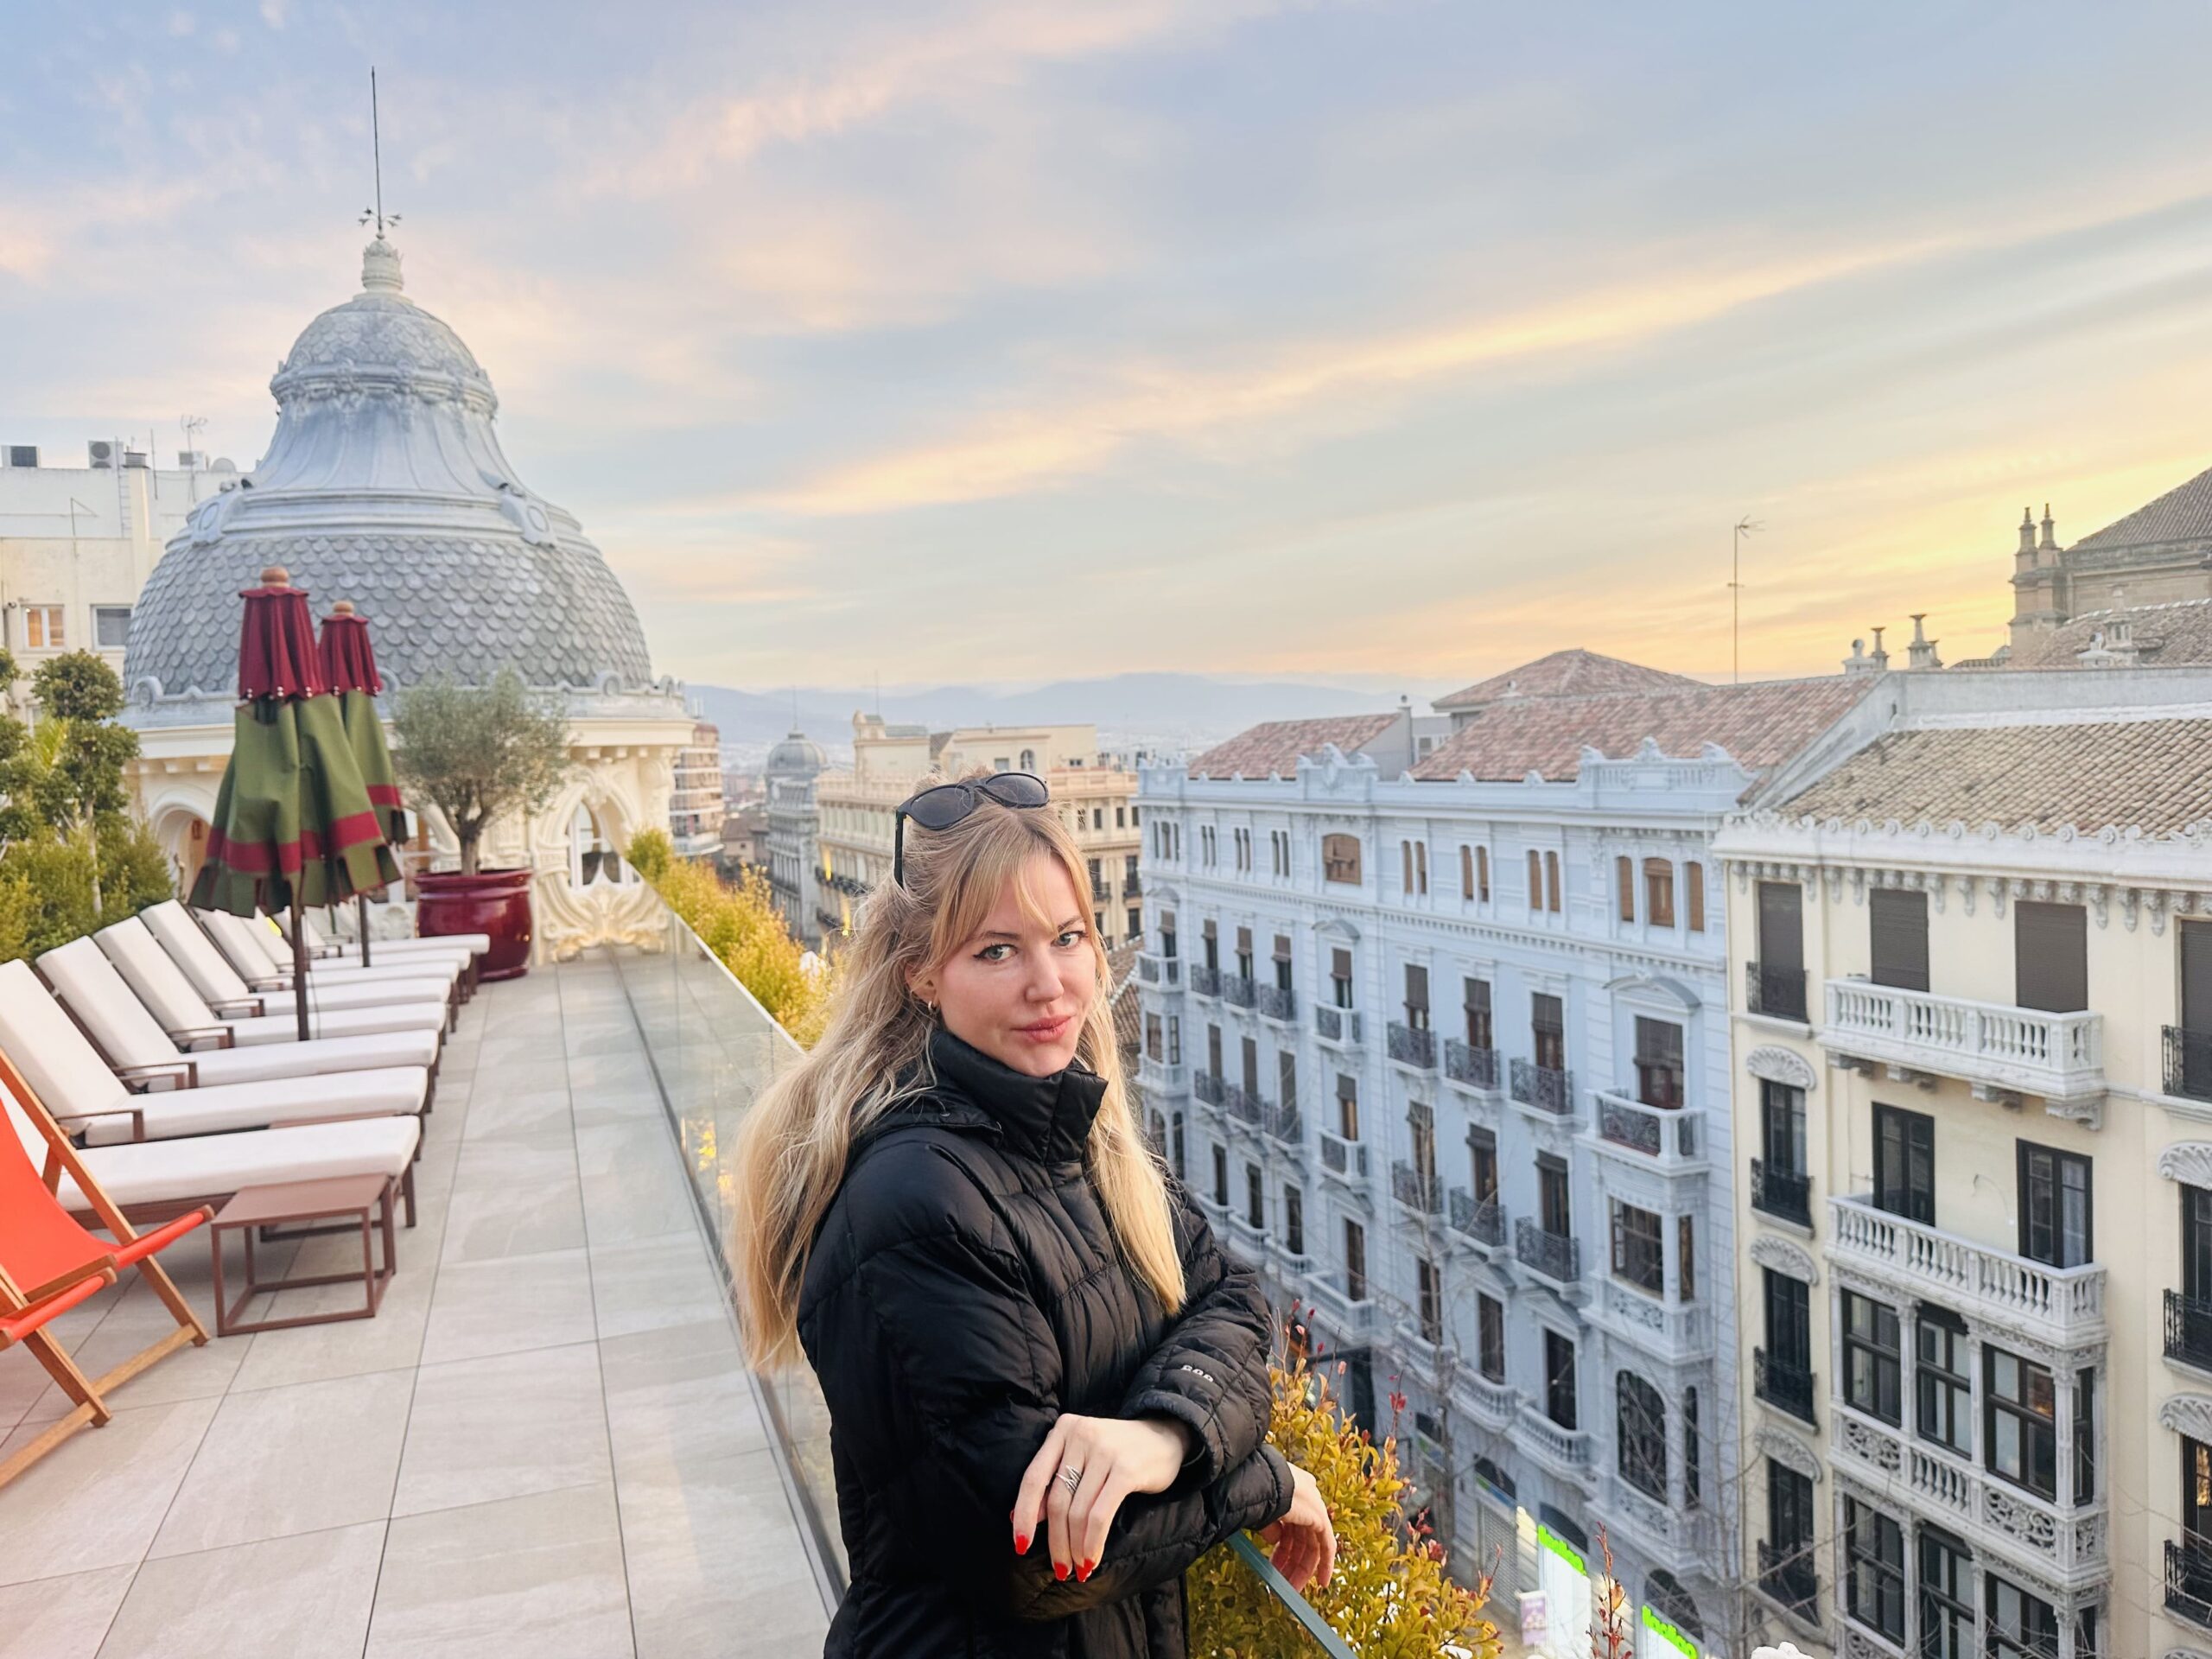
As I write this, I’m sitting in a cafe in Pipa, Brazil:
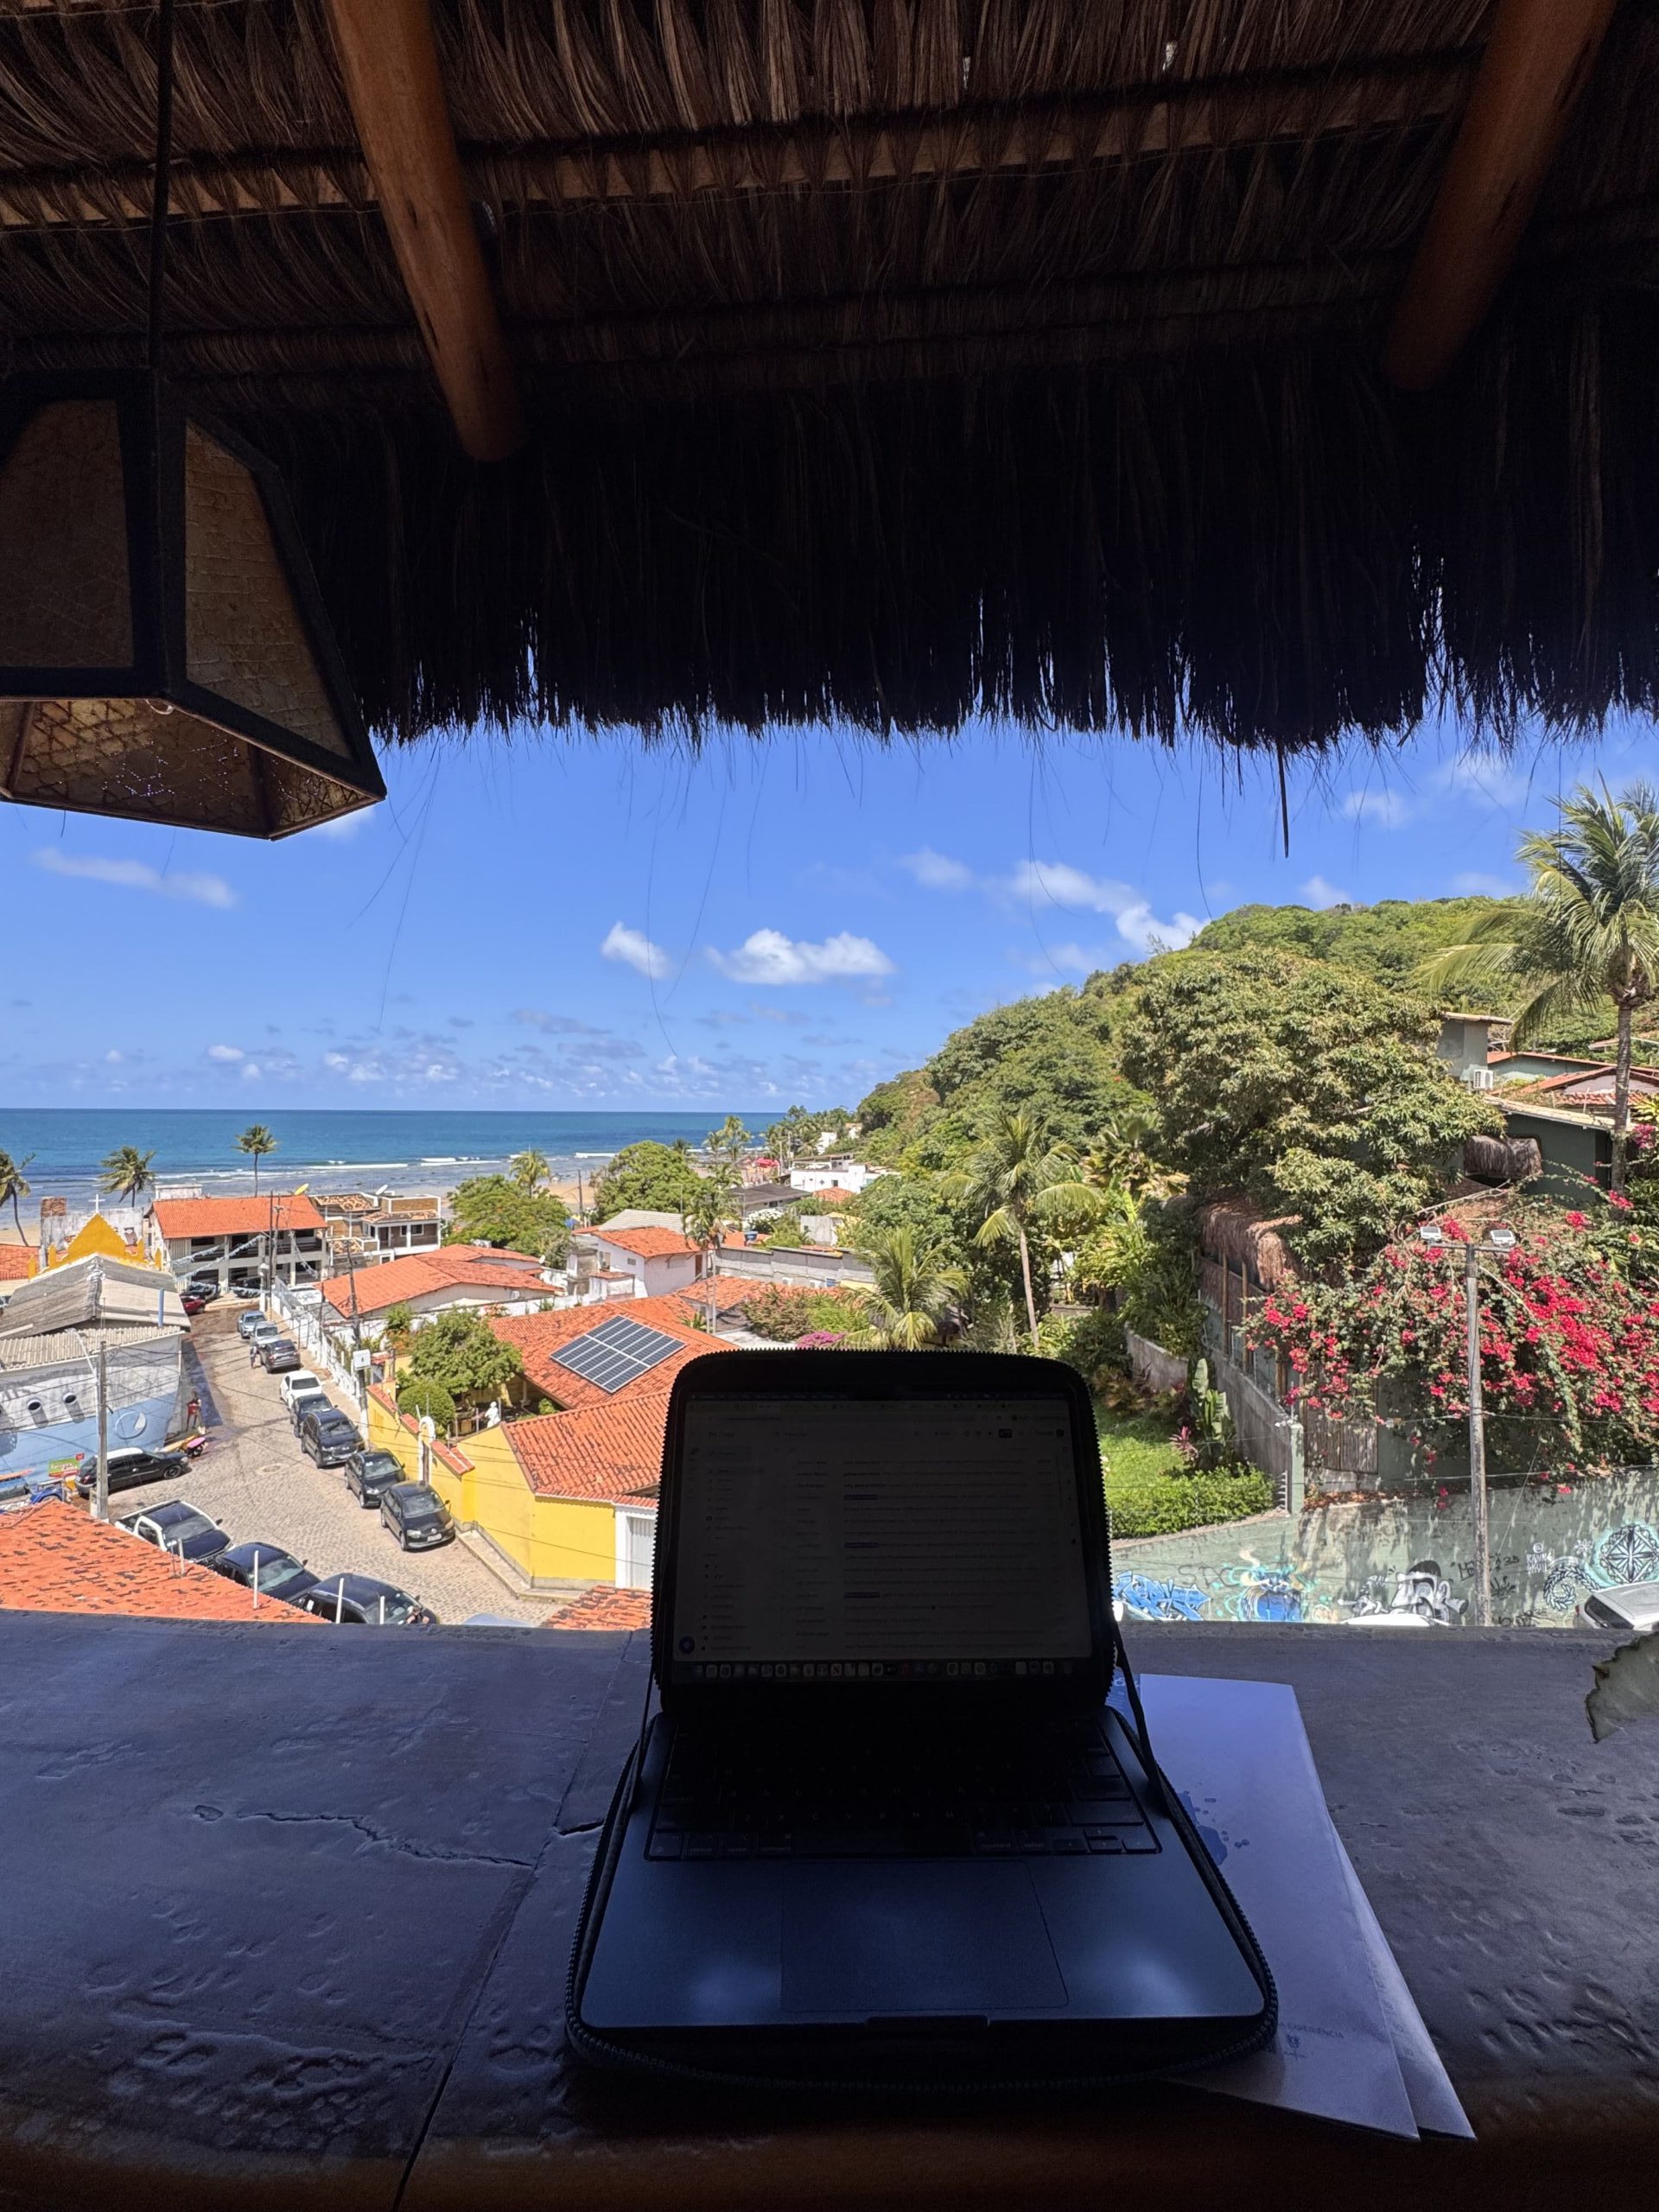
(It’s amazing here BTW – highly recommend)
But my life didn’t always look like this.
9 years ago, I was sitting in a cubicle in San Diego, California, working a 9-to-5 as a proofreader. I was making $17 an hour (not even enough to cover all my bills) and each day, I would count down the hours until I got to leave the office. I wanted to travel, but my 12 days of PTO per year didn’t allow that.
Suffice it to say… I was miserable.
I told my brother that I wanted to find a job that would allow me to work remotely and he said “you’re gonna need more experience before you can do that.”
Well… he was wrong. One year and 3 months into my office job, I landed a remote job as a content marketer at a digital agency (through Facebook of all places!).
That job paid me more than my last job ($23/hour). And it gave me the freedom to travel and live anywhere I wanted. I loved the location independence and stable salary that job gave me — but I didn’t like the fact that I had to work 8 hours per day and be “in the office” certain hours.
I wanted more freedom. The freedom to work when I wanted, charge my own rates and be my own boss. So after four years, I left that job to launch my own freelance copywriting business. A business that’s allowed me to make more money. Working way less (normally just a couple of hours per day).
In this blog post, I’ll walk you through, step by step, how to become a digital nomad like me — whether you want to work for a company or work for yourself — plus all the the things I wish I knew before I started.
Ready? Let’s dive in.
BTW: This is a long one, so grab a cup of coffee and get comfy. If you want to skip around, here’s a table of contents for ya:
Do you really want to become a digital nomad?
Before you answer “well duh” lemme explain…
Being a digital nomad looks amazing on Instagram, but it has its ups and downs. First, let’s talk about the pros…
Pros of being a digital nomad
You aren’t tied to one place
This one is obviously the biggest pro of all. I love being able to pick up and go to Brazil… or Thailand… or home to visit my family and friends… whenever I feel like it. And not have to squeeze all my travel into 12 days of PTO per year.
Your schedule is more flexible
Digital nomads normally have more flexibility and control over when they work, how much they work and how they structure their day. Especially freelancers. Personally, I’m most productive in the mornings and early afternoons. By late afternoon, I’m checked out.
If you work for a company, you might not have as much flexibility. With my remote job, I had to work 8 hours per day and was paid by the hours I worked, rather than my output or deliverables. However, my boss did allow us some flexibility over our schedule. We only had to be “in the office” or on Slack from 10-2PM ET.
You can save money
Every time I go back to the US, I’m shocked by how expensive it is. I read that you need to make $120K per year now to live comfortably in the US.
I can live on much less than that while traveling the world. On average, I spend around $2000 – $2500 per month for a fairly cushy lifestyle (that includes eating out regularly and working from cafes).
I can stay in hotels and Airbnbs that would cost a fortune in the US. Like this Airbnb I stayed at in Kuala Lumpur for $30/night (with an incredible rooftop pool to boot):

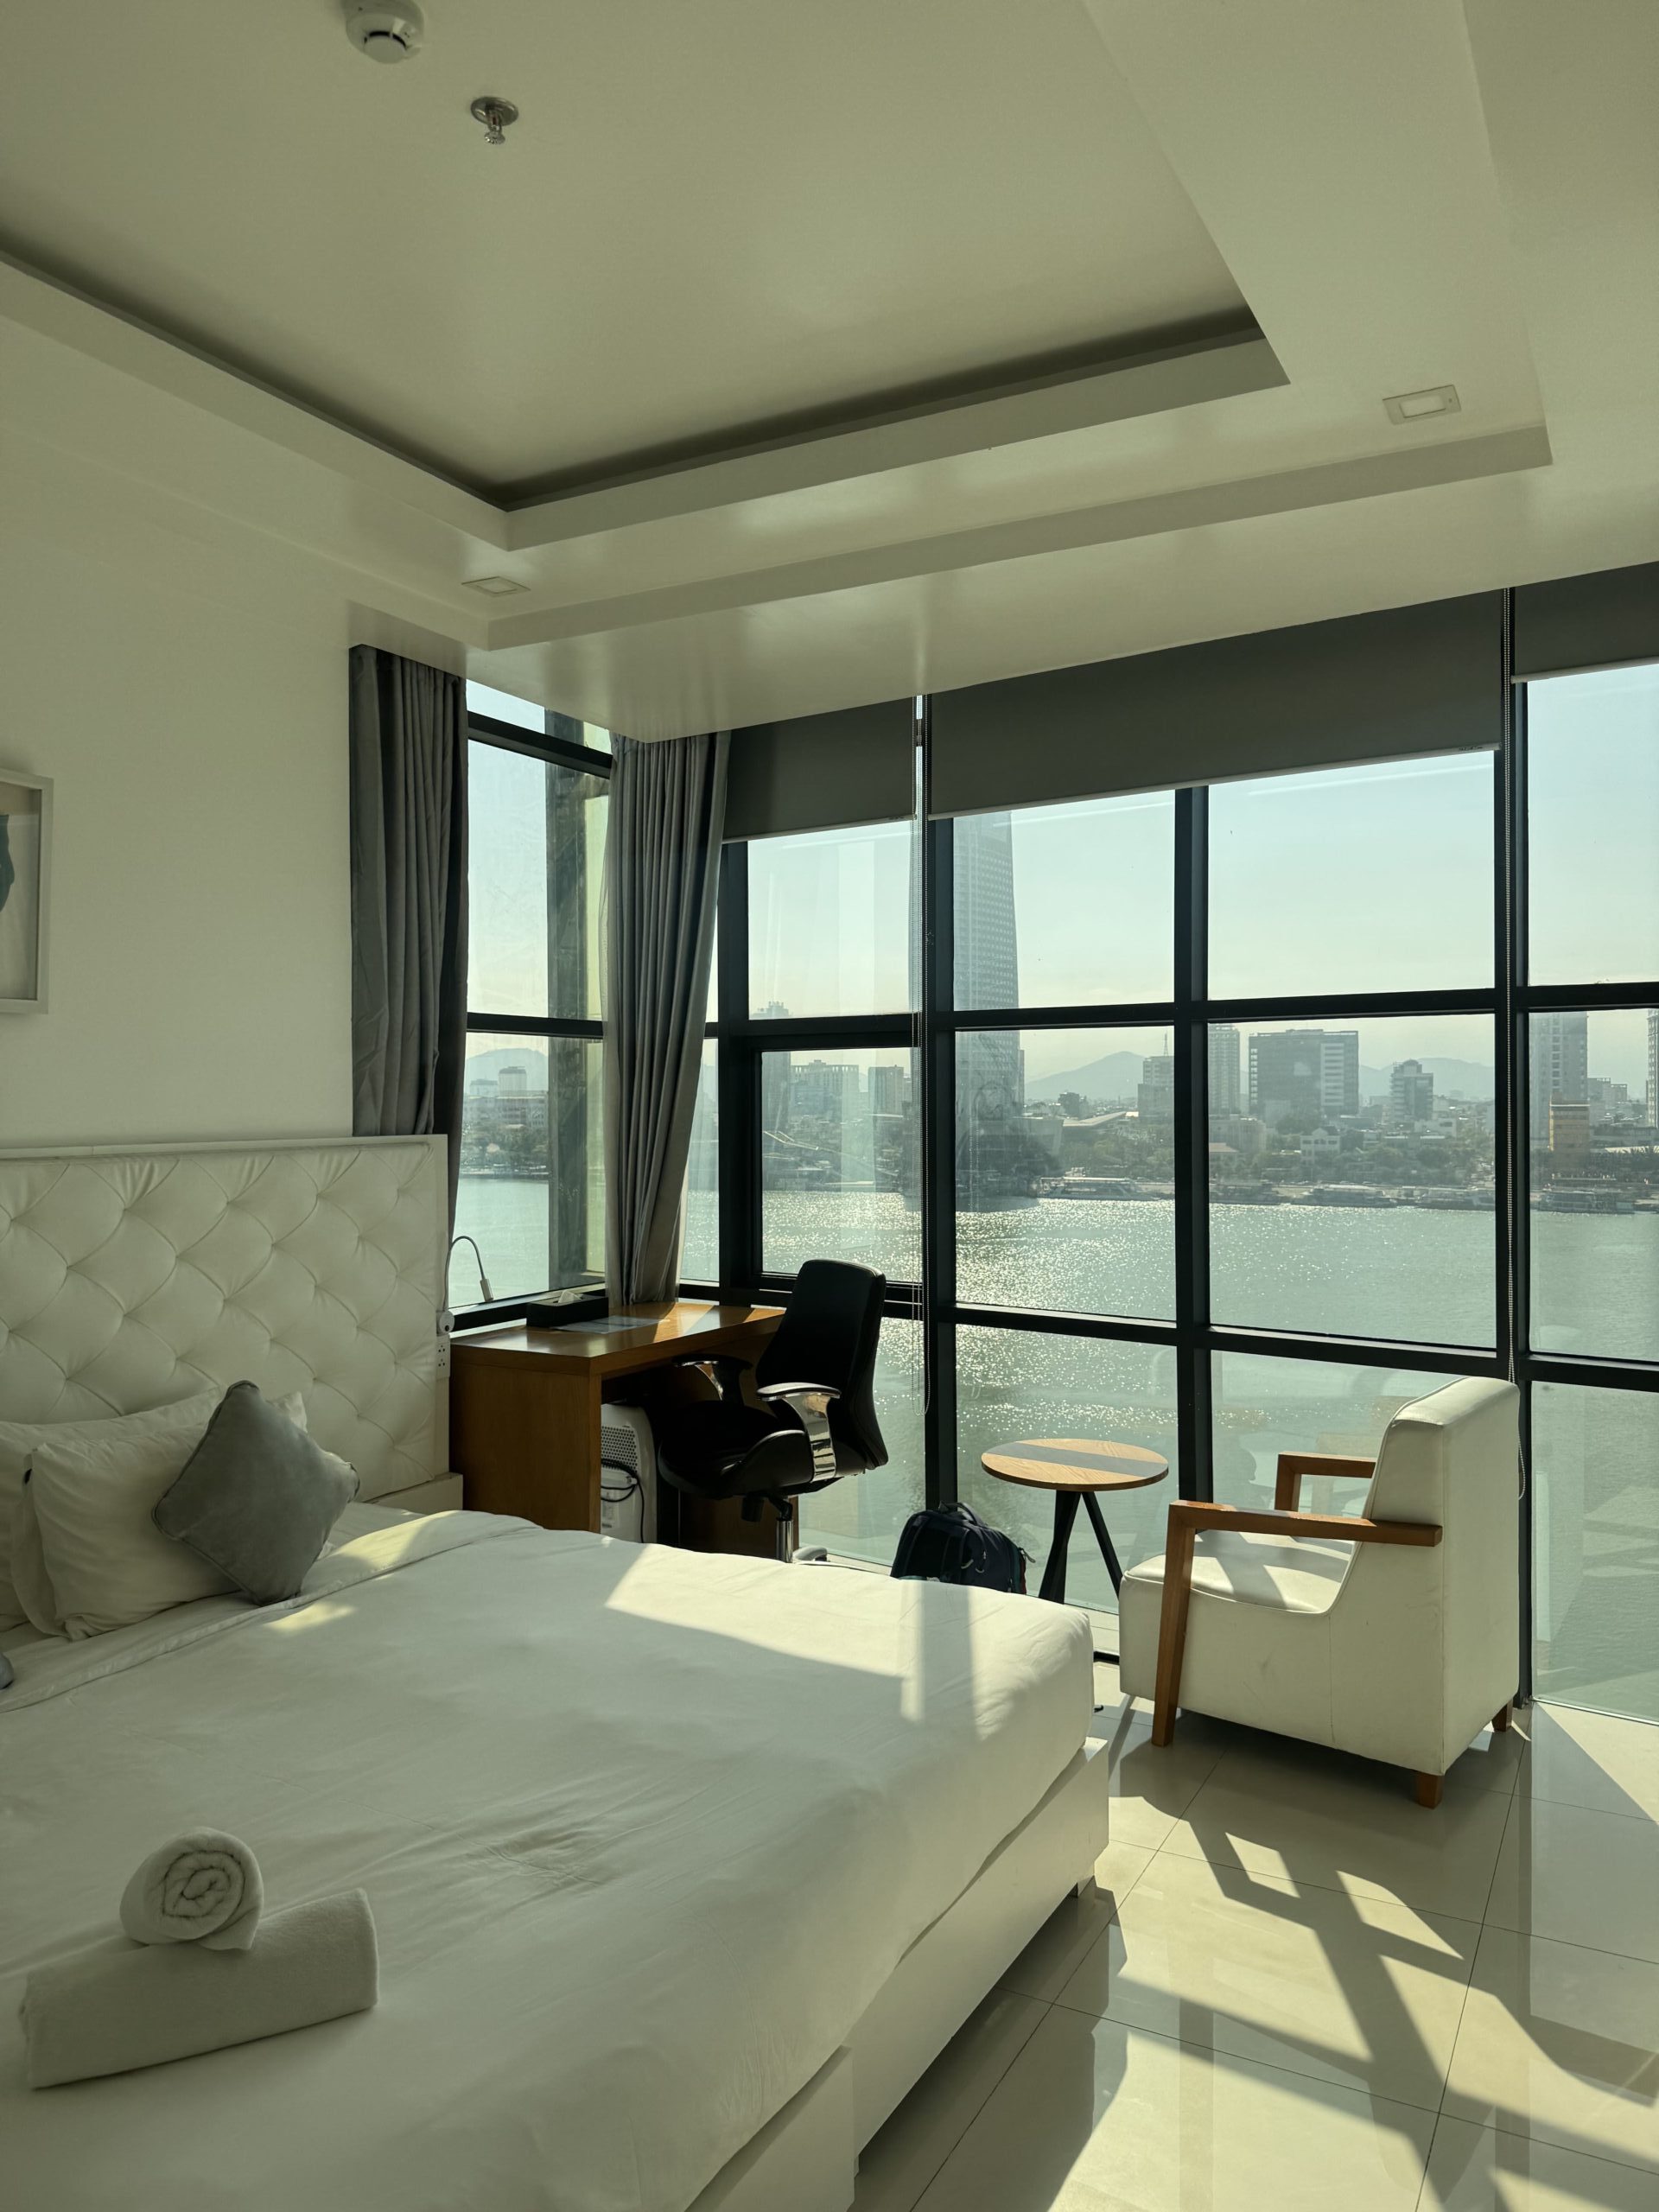
Or this hotel I stayed at in Da Nang, Vietnam for just $17/night:
Another benefit to being a digital nomad is that you can stay in places for longer, which allows you to get discounts on accommodation and live more like a local rather than a tourist.
You meet interesting people from all around the world
Throughout my travels, I’ve made lasting friendships with people from all around the world. Including Ireland, Japan, Argentina, Brazil, France, Slovakia, Belgium, Spain… and the list goes on.
Having friends from different countries and cultures opens your eyes to new perspectives and ways of thinking.
Cons of being a digital nomad
Having too many options can be overwhelming
While having location independence is amazing (no doubt about it), sometimes it can be overwhelming deciding where to go next. In fact, having too many options can lead to unhappiness (Google it if you don’t believe me – it’s called the paradox of choice. If you get into copywriting, you’ll learn about it).
I was actually chatting about this with another digital nomad last night. She said she wished someone could just tell her where to live so she didn’t have to choose. I told her I had literally thought the same thing the other day lol.
It can be very lonely (and dating is difficult)
If you travel alone, it can be incredibly isolating and lonely at times. When you’re constantly on the go, you have to always make a conscious effort to meet new people (which can be exhausting if you’re an introvert like me).
Relationships are often short-term since people are always coming and going. So it can be hard to build lasting friendships.
Dating is difficult because it’s hard to find other digital nomads that share your lifestyle who you also have a connection with. Plus, it seems like many digital nomads are looking for short-term flings.
It can be hard to create a routine
If you’re constantly traveling, it can be hard to build a routine. That’s why I’m a fan of slow travel. Still, each time you go somewhere new, it takes time to book flights, find accommodation, figure out visa stuff, and other logistics (like getting a SIM card and setting up a workspace).
The older I’ve gotten, the more I’ve started craving community, home and routine over travel. So TBD if I continue this digital nomad lifestyle or become more settled.
You miss out on live events
Being a digital nomad means you’ll inevitably miss out on major life events happening at home. Like weddings, bachelorette/bachelor parties, baby showers… or whatever else. Some of my good friends have kids that I’ve never even met.
It’s much harder to have pets
This is another reason why I want to settle down more. I looooove animals and every time I pet sit, I wish that I had a dog (or a cat, but especially a dog lol). Like this adorable thing:

If you’re a part-time nomad with a home base, maybe you can find a way to have pets and still travel. But it’s not easy.
It’s harder to be productive
Every time I arrive somewhere new, work is the last thing on my mind — I just want to explore. I almost always end up spending the first few days wandering around instead of working. Which definitely takes a toll on my productivity (not to mention all the time I spend traveling from one place to another).
You’ll miss comforts from home
As I’ve gotten older, certain things have become more important to me. Like clean food, clean air, and clean water. When I travel, I’m often stuck buying plastic water bottles and eating foods that I otherwise wouldn’t eat. I’ve found it much harder to find high-quality organic produce in places like Southeast Asia and Brazil, for example.
Maybe you’ll miss having your own bed (I know I do). Or having a big screen TV with Netflix, Hulu and HBO Max.
Whatever it is, you’ll have to be willing to give some things up when you become a digital nomad.
It can be tiring
Every time you move that means:
- Booking new flights
- Traveling potentially long distances
- Finding new accommodation
- Packing and unpacking
- Figuring out where to work from, where to shop and how to get around
- Navigating language barriers
- Making friends
It can be exhausting. Physically and mentally. Which is another reason why I’m a fan of slow travel!
So… do you still want to become a digital nomad?
If you’re still not sure, ask yourself this:
- Are you ok with a bit of uncertainty?
- Are you self-disciplined? Can you motivate yourself to work even if you’re traveling on the go or in a beautiful paradise?
- Are you okay being far from family and friends for extended periods of time? Or do you get homesick easily?
- Do you enjoy spending time alone?
- Are you ok with not having a normal routine for a while?
If the answer to those questions is “yes,” or “I think so” then you just might love the digital nomad lifestyle. If you answered “no” more times than yes, then you might want to reconsider.
If you want to become a digital nomad but the idea of traveling full-time sounds exhausting, you could become a part-time nomad (like me)! Have a home base somewhere and then travel for half the year… or a few months out of the year.
The beauty of being a digital nomad is that YOU get to decide what freedom means to you.
Sound good? Here’s how to become a digital nomad, step-by step.
Step 1: Choose a location-independent career
If you already have a digital nomad job or business, skip to step 5. If you already have a skill that you can do remotely, skip to step 3.
And if you’re starting from scratch, don’t worry! You probably have more skills than you think you do.
For example, maybe you’ve been waitressing for the last 10 years. Those people skills would be super valuable for any customer service role.
Or maybe you’ve been working as an office admin for years. You already know how to manage emails, juggle tasks, and keep things organized — which would translate perfectly into a virtual assistant role.
Want something a little more challenging? There’s a lot you can do in marketing – and it’s one of the easiest fields to break into remotely if you’re willing to learn.
If you’re not sure what path to choose, start with what you actually enjoy doing — the thing you’d happily spend hours on even if nobody was watching.
For me, that’s always been writing. I’ve always loved blogging, and eventually I realized I could turn that same skill into income (first through content writing… and then copywriting).
To get some ideas flowing, here are some things you could do as a digital nomad…
Roles you can start with (that require little to no training)
- ESL teacher/tutor
- Virtual assistant
- Customer service rep
- Proofreader
- Data entry clerk
- Community manager
Roles that require more training/experience
- Copywriter
- SEO specialist
- Email marketing specialist
- Content marketing specialist
- Social media marketer
- CRO & funnel expert
- Paid ads specialist
- Data analyst
- Ghostwriter
- Designer
- Software engineer/developer
Click here to see a full breakdown of each role — including what the job actually involves, typical pay ranges and even more digital nomad jobs.
If you’re still not sure, go to a job site like Indeed.com. Search for job titles that interest you, read through the responsibilities and take note of what excites you.
But don’t put too much pressure on yourself to figure it all out now. The first thing you choose doesn’t have to be the end all and be all. I started out working as a part-time virtual marketing assistant for an agency. That job didn’t pay much but it gave me a little boost of confidence -– and soon after, I landed my full-time remote job as a content marketer at a digital agency.
Step 2: Build a monetizable skill
Now that you (hopefully) know what you want to do, it’s time to build those money-making skills!
And before you panic, thinking you need to go back to school for 4 years… don’t worry! You definitely don’t.
Most location-independent careers are skill-based, not degree-based. My former boss told me that he never even went to college before starting his digital marketing agency!
But if you want to work as a freelancer or run your own business, you will need to know how to market and sell yourself (in addition to whatever skill you’re learning).
Good news is that nowadays you can learn pretty much anything online. There is a lot of free content out there to get started but if you want a highly paid skill — like one in digital marketing or software development — you’ll likely have to invest in training.
When I started out in copywriting, I started by reading Copyhackers blog posts and books on copywriting, marketing and psychology. Then I invested in Copy School by Copyhackers. I paid $2,000 for a lifetime membership to Copy School but I can honestly say that it’s been worth every penny. That training helped me gain the skills I needed to write high-converting copy, feel confident in my process and charge higher rates.
It can be overwhelming learning about a topic if you’re starting from scratch. But keep in mind that you don’t need to know everything about a topic to be an expert on it. Not even close. You just need to know more than the person who hires you. You should also constantly be learning (even after you’re hired for a remote job or project). Especially in marketing, where things change quickly and you need to adapt.
If you want to become a digital nomad copywriter, start with my Nomad Copywriter Starter Kit. I may be biased (lol) but it gives you all the essentials you need to get started — everything that I wish I had when I was starting out as a freelance copywriter.
If you can afford it, I also highly recommend joining some sort of paid mentorship program or community in your industry. For a few reasons. Firstly, building connections with other freelancers is always going to help. It also helps to have a mentor or people who have been in your shoes before and can guide you in the right direction.
I was part of Copyhackers’ Freelancing School for several years (it’s since shut down) — and it was definitely worth the $97/mo I paid. Honestly, the search feature alone was worth the membership fee. Anytime I had a question, I’d type it into the search bar and usually find that someone had already asked the same thing.
There were also different channels in Slack where we could post questions and get feedback from other freelancers or coaches. Plus there was a weekly Office Hours where we could ask questions related to freelancing and the coaches would respond.
Step 3: Get your first clients or remote job
Do you prefer to work freelance or full-time for a company?
There are advantages and disadvantages to both. Some people prefer the stable income that comes from a full-time job and knowing how much they’re going to make each month.
Personally, I like working for myself because I get to work the hours that I want and charge the rates that I want. Honestly don’t think I could work 8 hours per day anymore either lol.
Long-term, you have much more growth potential if you work for yourself. I also like that I don’t have to report to anyone and my livelihood isn’t dependent on someone else.
For obvious reasons, it’s easier to land projects as a freelancer than to land a full-time remote job.
That said…
If you’re looking for a full-time remote job
Check sites like LinkedIn and Indeed (and filter by “remote”). There are also a lot of job sites dedicated to remote jobs only. Like:
The only thing is that many US-based companies require you to work from the US — which for me is a dealbreaker.
You could also check out Facebook groups tailored to remote jobs – that’s actually how I found my first remote job! I just posted in one of the groups (honestly can’t even remember which one now), saying that I was a “virtual marketing assistant” looking for work and my former boss responded saying he was looking for a content marketing specialist for his company.
We exchanged a few messages and I think I sent him a few samples of my work – and then he hired me! Without even a phone conversation. At the time I wondered if it was too good to be true. I thought “there’s no way he’s actually going to hire me without even a phone interview…”
But he did! I started working 4 hours per day for him and then a few months into my role, transitioned into a full time role with benefits.
That’s another good way to get your foot in the door BTW: start out as a part-time contractor and then, once you prove yourself, transition to a full-time role.
I definitely got lucky — and it may be much harder now than it was for me 9ish years ago. But still worth a try!
Here’s a blog post I wrote that goes into more detail on how to find a remote job.
If you currently have a job that’s hybrid or possible to do remotely
Read Tim Ferris’ The Four Hour Workweek. He gives better advice than I could give you on this but he explains how to convince your boss to let you work remotely.
Basically, start by working from home a couple days per week (if you aren’t already). Prove to your boss that you can get work done this way/are more productive working from home. And eventually (after a few months or so) make an argument for why you should work remotely full-time.
Prefer to go freelance/start your own business?
Join the club!
To start getting clients, there are a few different avenues you could try…
The short game (to get clients right away)
Upwork
Upwork is one of the most popular freelancing platforms out there. But it gets a bad rep — and for good reason. There are a lot of cheapo clients on there who don’t pay well. I have a love/hate relationship with the platform, but Upwork is personally where I’ve had the most success getting clients.
My best client (who pays me $3,000/mo to manage his Google Ads) came from Upwork. And it’s where the majority of my other clients have come from.
That said, it’s definitely an uphill battle nowadays because the competition is fierce. It can also be expensive because you have to pay for each job that you apply to (sometimes up to $6!).
So I wouldn’t even bother applying to jobs with a lot of applicants (20-50 or 50+). Especially initially as you build up reviews. Instead, focus your energy on jobs that were posted at least 12 hours ago and have less than 5 applicants:
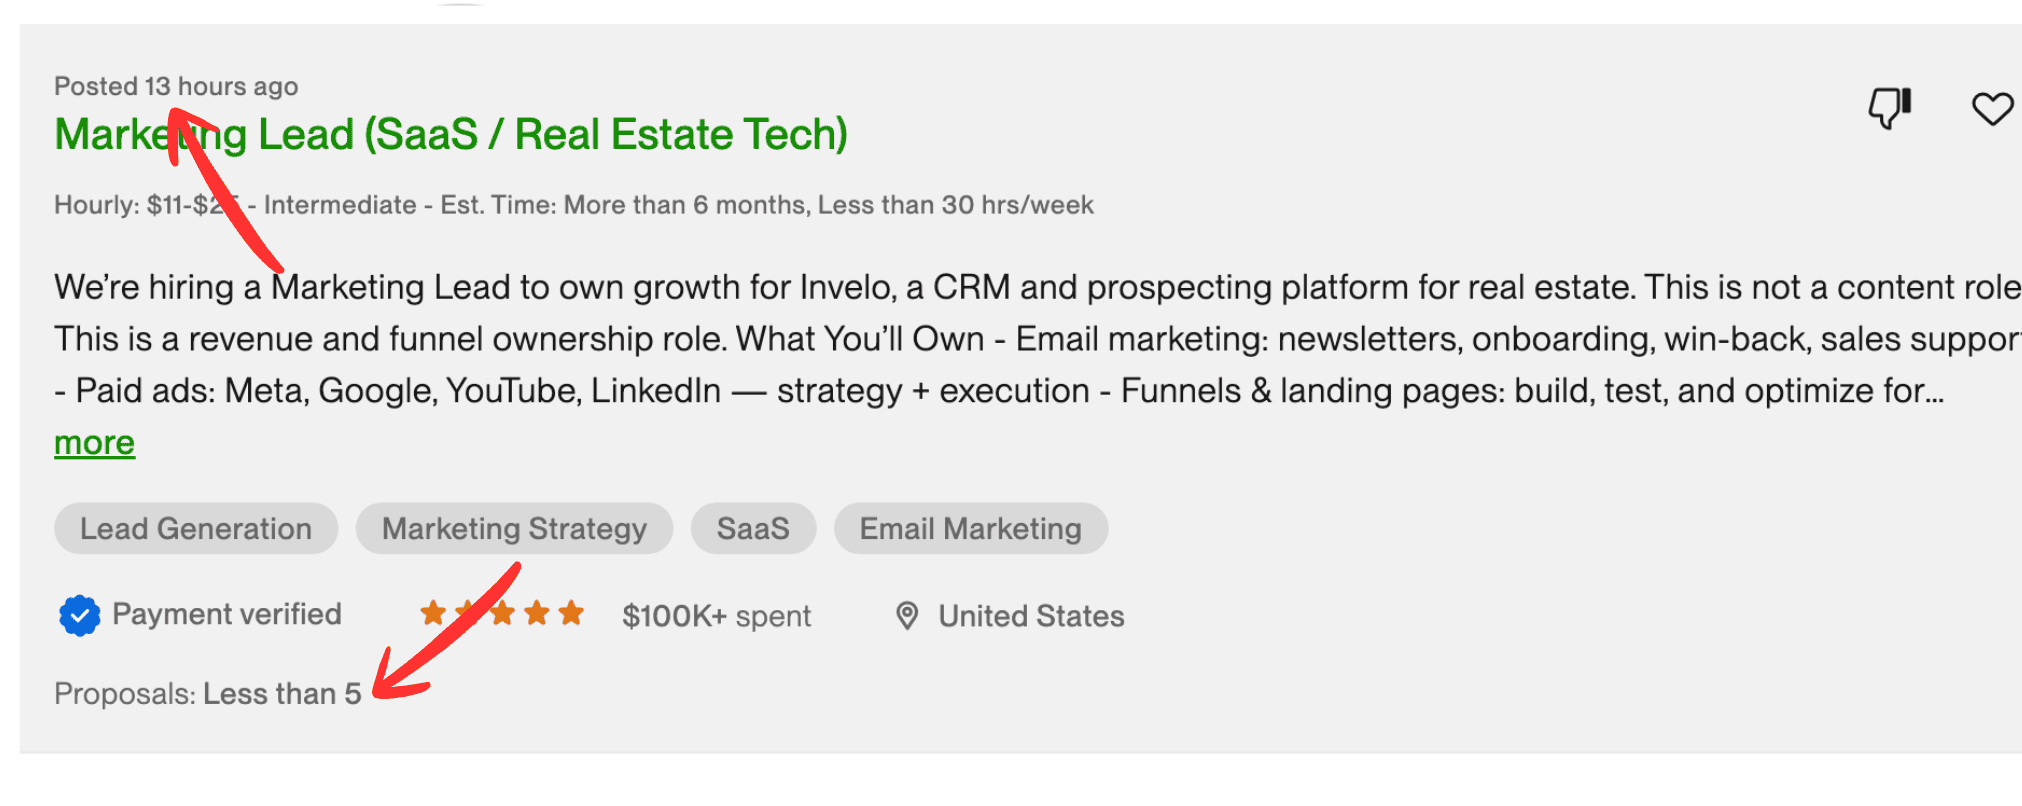
These jobs are less desirable (obviously) so you’ll have a higher chance at getting a reply.
Check out this blog post I wrote on how to write Upwork proposals that get “yes” replies.
Cold email
I’ve landed a few clients (and leads) through cold email. Here’s one email I wrote that was “among the best outreach” the recipient ever received. But I’ll admit: Like Upwork, it’s also gotten harder.
To get responses, you either have to send a LOT of emails or send fewer highly personalized emails. Still, it’s a matter of landing in someone’s inbox at the right time.
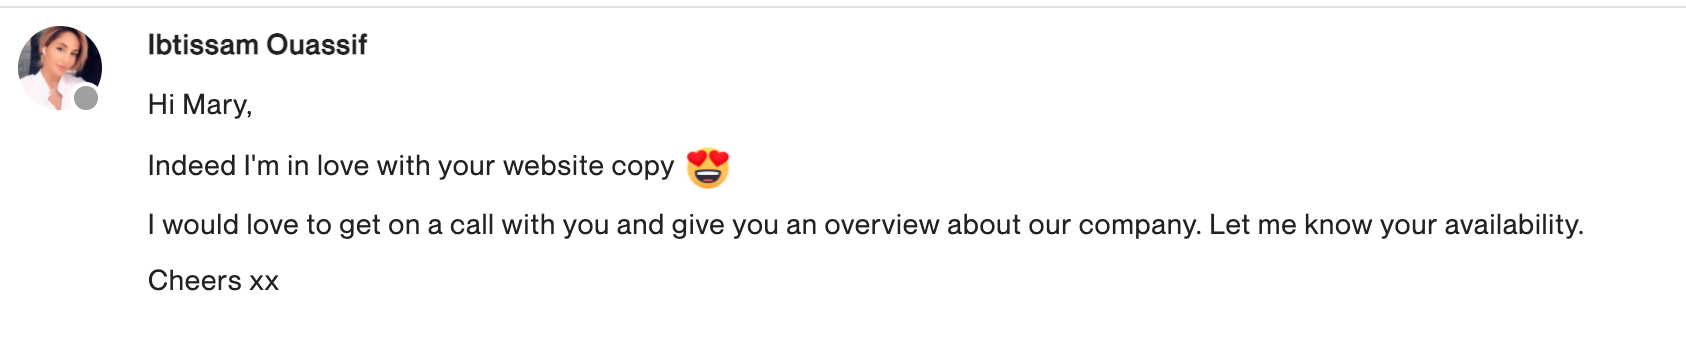
I prefer Upwork because at least I know that the person needs a copywriter — and the specific problems that they’re facing. So I can tailor my proposal to that. Like so:
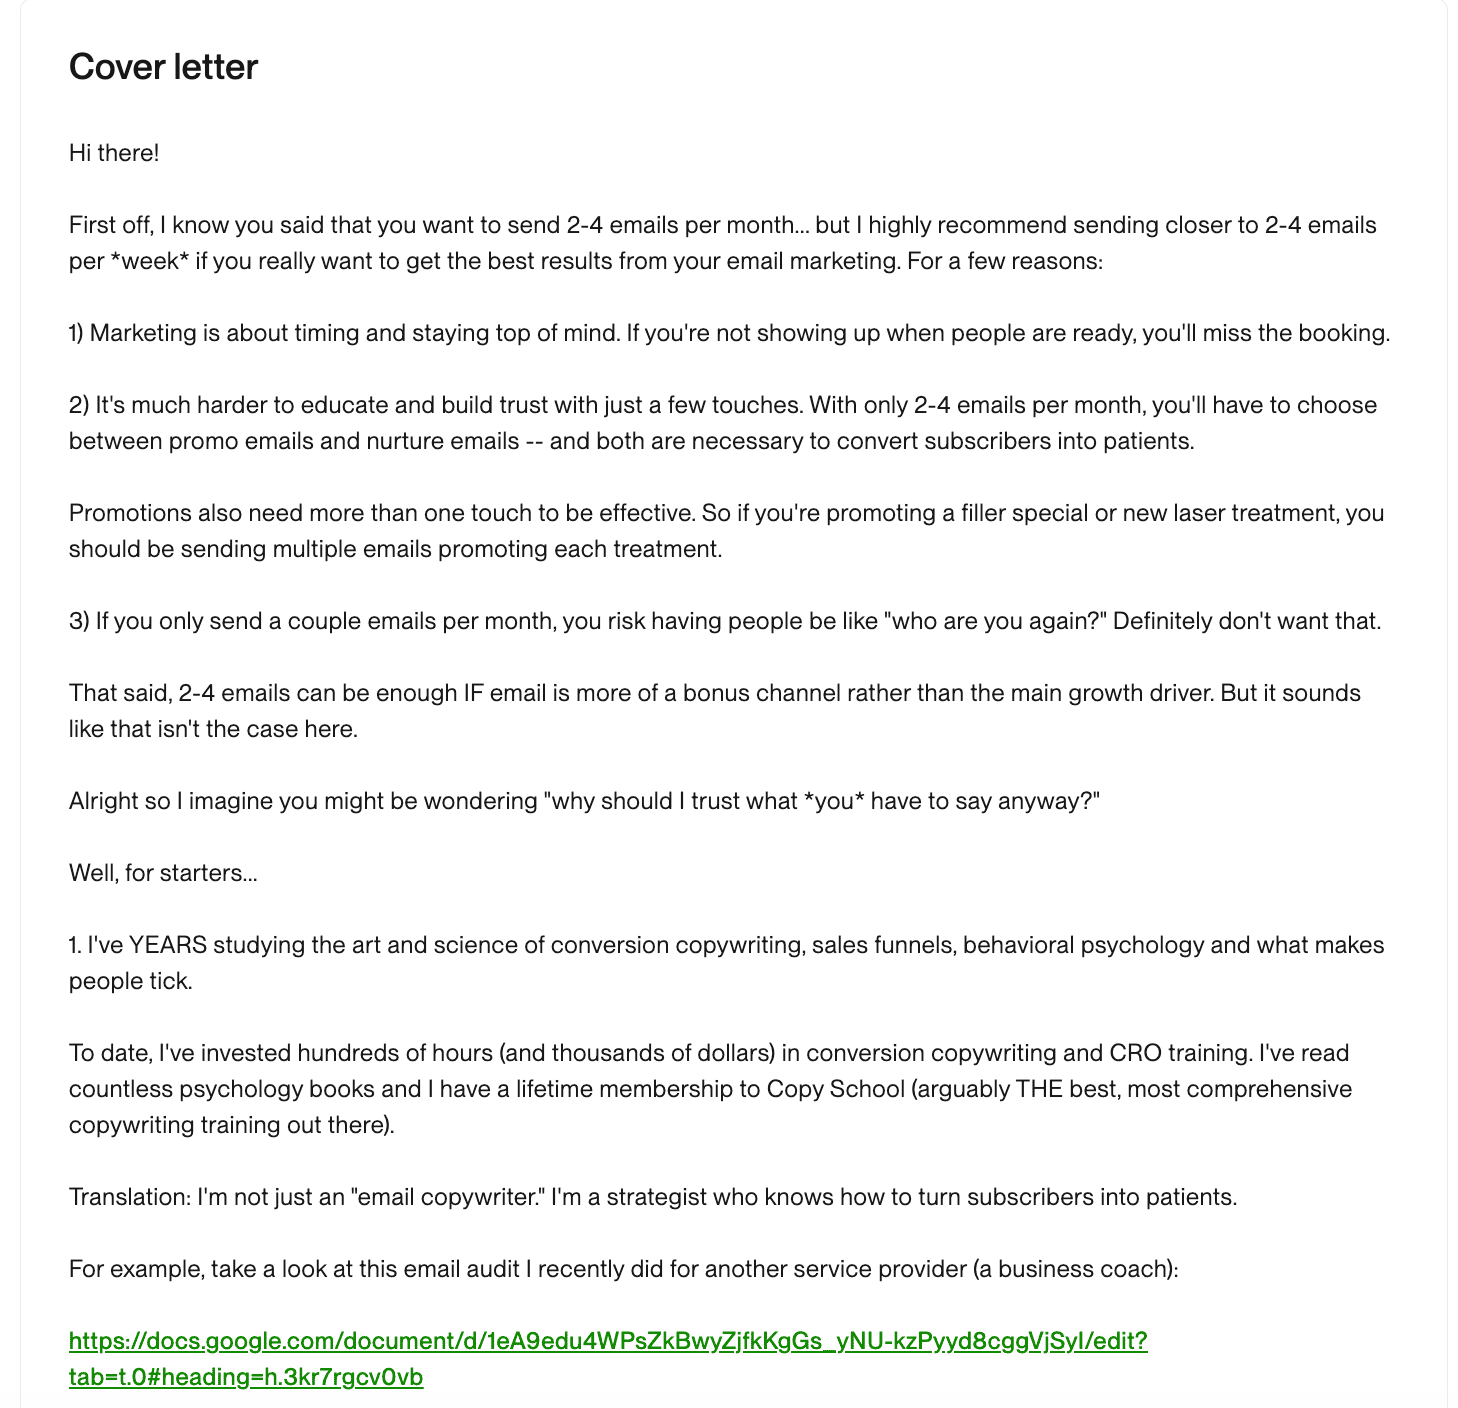

(That proposal scored me a sales call BTW.)
Ok but back to cold email. You might have more success if you reach out to agencies or pitch partnerships with people in your industry.
For example, I’ve pitched web designers since they often work closely with copywriters or need copywriters that they can refer to their clients.
When I was first starting out, I also partnered with another copywriter who sent me a lot of leads (one of whom turned into a client). This was the email that I sent her:

Find someone who is already more established or who likely has a large influx of leads. For example, the copywriter I reached out to was ranking on the first page of Google for “SaaS copywriter” so I imagine she got a lot of leads from SEO.
To increase your chances of getting a response, you could offer a 10%-15% referral fee of the first project like I did.
LinkedIn & Threads
The search feature is your BFF here. Search for posts with keywords including the type of role you’re looking for. Then you’ll see posts of people looking to hire for your role.
For example, look at the first two posts I saw on Threads when I searched for “copywriter”:
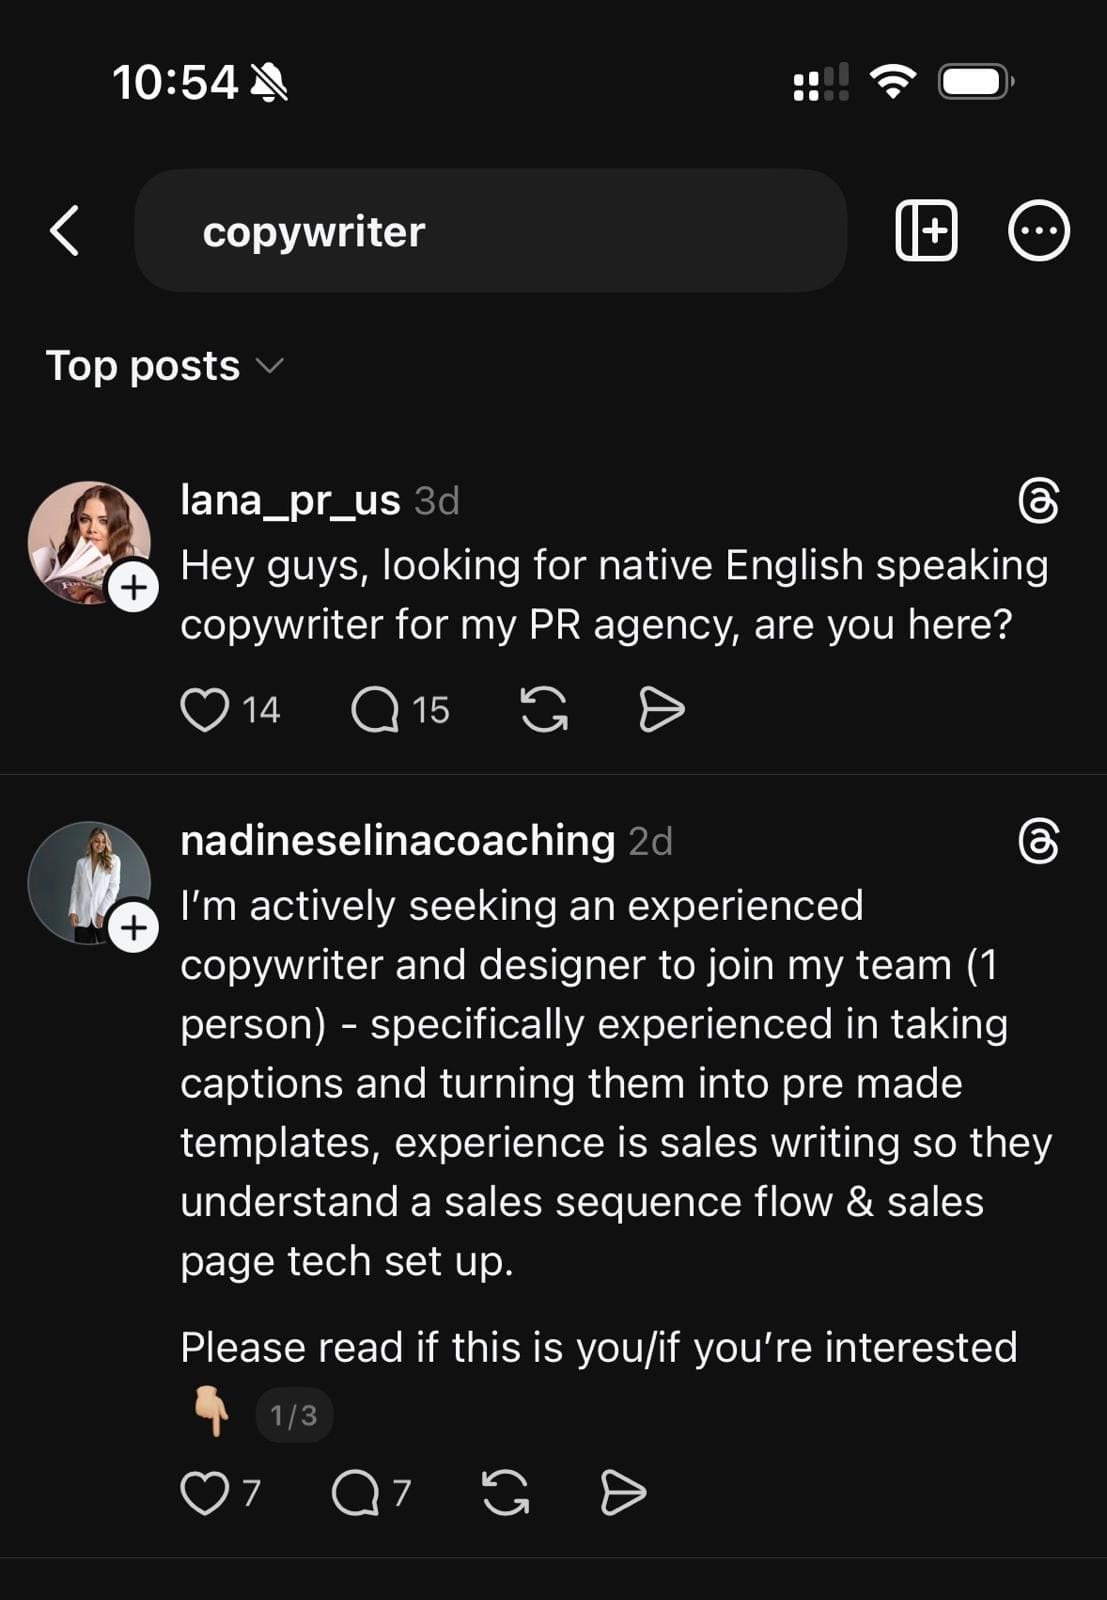
The only downside is that (as you can imagine) there is a lot of competition for these roles. So you have to find a way to stand out in the comments.
Facebook groups
This isn’t my area of expertise TBH – I think I’ve only landed one or two clients from Facebook groups. But my former business partner, Abi Prendergast, had a lot of success finding clients this way. Here’s a blog post she wrote on the topic.
Basically, you’ll want to join groups where your target audience hangs out. From there, you can search for posts with your job title, where people might be looking to hire. And pitch in the comments.
For example, let’s say you want to do social media for female entrepreneurs. You could join the Women Entrepreneurs Facebook group.
I just did a search for “social media” in that group and here’s the first post that popped up:
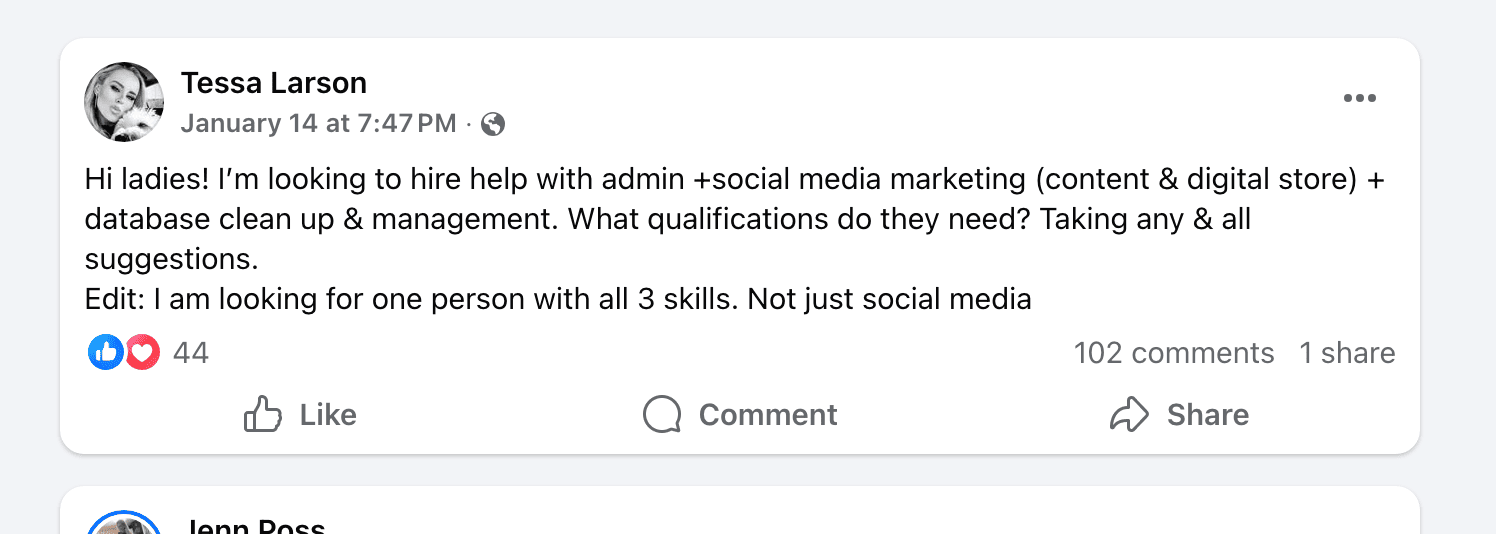
But again… a lot of competition as you can see. So you have to find a way to stand out in the comments (this is why copywriting is such a valuable skill!).
But pitching your services is just part of it. Also think about providing value. See what questions people are asking in the groups and provide helpful answers.
The long game
All of the above tactics require you to reach out to potential clients. But if you want leads to reach out to you, you need to focus on relationship-building and authority-building.
Relationship-building
People hire people they like and trust. Which is why it’s so important to build relationships before selling.
Here are a few ways you can do this:
- Connect with potential clients and partners (people who already work with your ideal clients) on LinkedIn or Instagram (wherever they hang out). Send a genuine message (NOT pitching or selling anything).
- Reply to posts on Linkedin or Threads (or wherever your audience hangs out) with helpful, thoughtful comments (not just “nice post” but something that actually adds value)
- Engage in relevant subReddits and add value by answering questions and sharing helpful insights
- Connect with other freelancers in your industry (they could eventually become collaborators, referral partners or people to team up with on projects)
Relationship-building takes time and you shouldn’t go into it expecting to land clients or it could backfire. Just focus on starting conversations and building connections.
Authority-building
To build authority, you need to target one type of audience and become known for just ONE thing.
Specializing will make it much easier to stand out and will allow you to charge higher prices. It will also make it easier for people to refer clients to you. They’ll think “Oh Janet – she’s the one who does paid ads for healthcare companies.” You’ll be the first person that comes to mind when that kind of client needs help.
Here are a few ways to build your authority:
SEO
With SEO, you want to think about what your ideal client is already searching for in Google — and then try to rank for those keywords.
I use Ahrefs to get an idea of monthly search volume and competition. I look for high-intent, low competition searches that get at least 100 searches per month. Then I create either service pages or blog posts around those topics.
By “high intent,” I mean keywords that your ideal clients actually use when they’re looking to hire someone.
For example, let’s say you want to do social media marketing for coaches. I just did a search in Ahrefs and saw that “social media marketing for coaches” gets 300 searches per month globally with an “Easy” keyword difficulty in Ahrefs. Requiring very few referring domains to rank in the top 10.
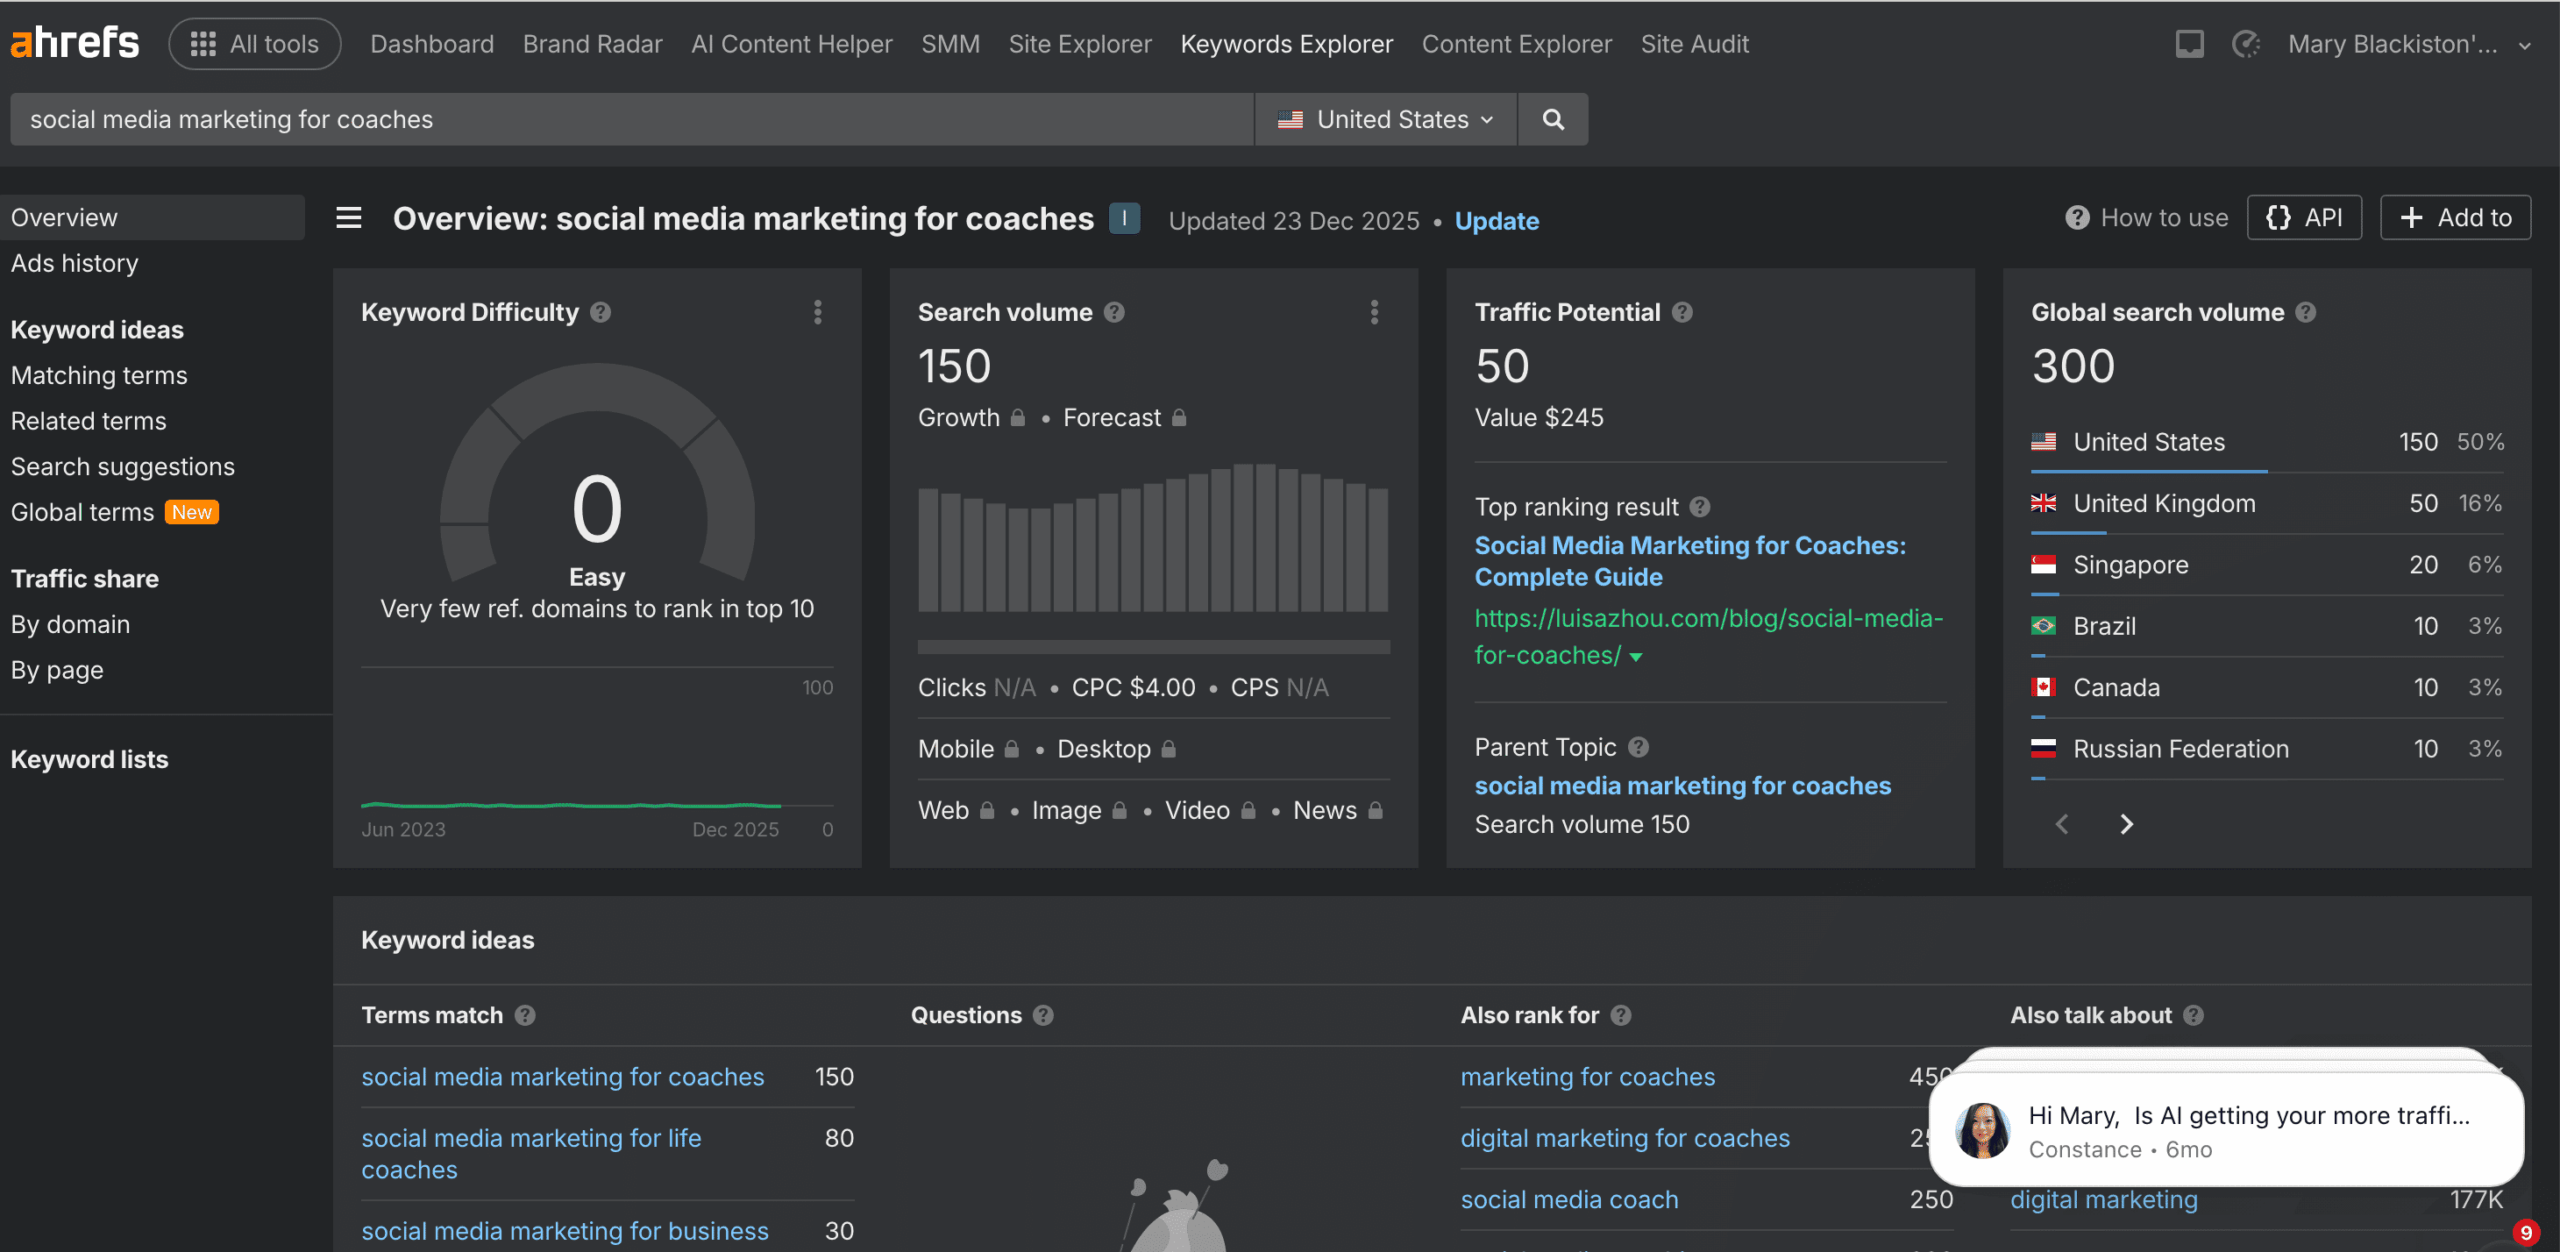
Someone searching for “social media marketing for coaches” is likely a coach searching for social media marketing services. It could include coaches searching for social media marketing tips or DIY advice. But it’s still a good opportunity to build authority — and potentially capture leads.
You could, for example, create a blog post around social media marketing for coaches.
Then potential clients landing on your blog post will see that you’re an expert on the topic. Making them much more likely to hire you.
Pro Tip: I highly recommend setting up your blog or website on WordPress. I tried Squarespace and despite creating long-form, high-quality content around low competition keywords, I still haven’t ranked (months later). And Google changed my SEO title to be UNclickworthy. With WordPress, Google normally keeps my SEO title and description and I’ve found it much easier to rank right away.
Also — make sure you add an opt-in form to capture leads who land on your website. You could create some sort of lead magnet (which is basically a free, helpful resource in exchange for their email) or just offer to send helpful tips and resources related to their goals.
Guest blogging
With guest blogging, you pitch and write articles for other websites in your industry that already have an established audience.
So instead of publishing on your own blog, you’re getting featured on someone else’s platform, usually with a short bio and a link back to your site. This helps improve your authority in two ways:
- You’re borrowing credibility from a trusted brand (people start to associate you with experts they already follow).
- Those backlinks signal to Google that your site is reputable, which can boost your own rankings over time.
To find websites to be featured on, here’s what you want to do:
- Find websites that serve your target audience.
- Put that website into Ahrefs to see the domain ranking (DR). You only want to write for websites with a domain ranking of at least 40-50 out of 100 (ideally even higher than that).
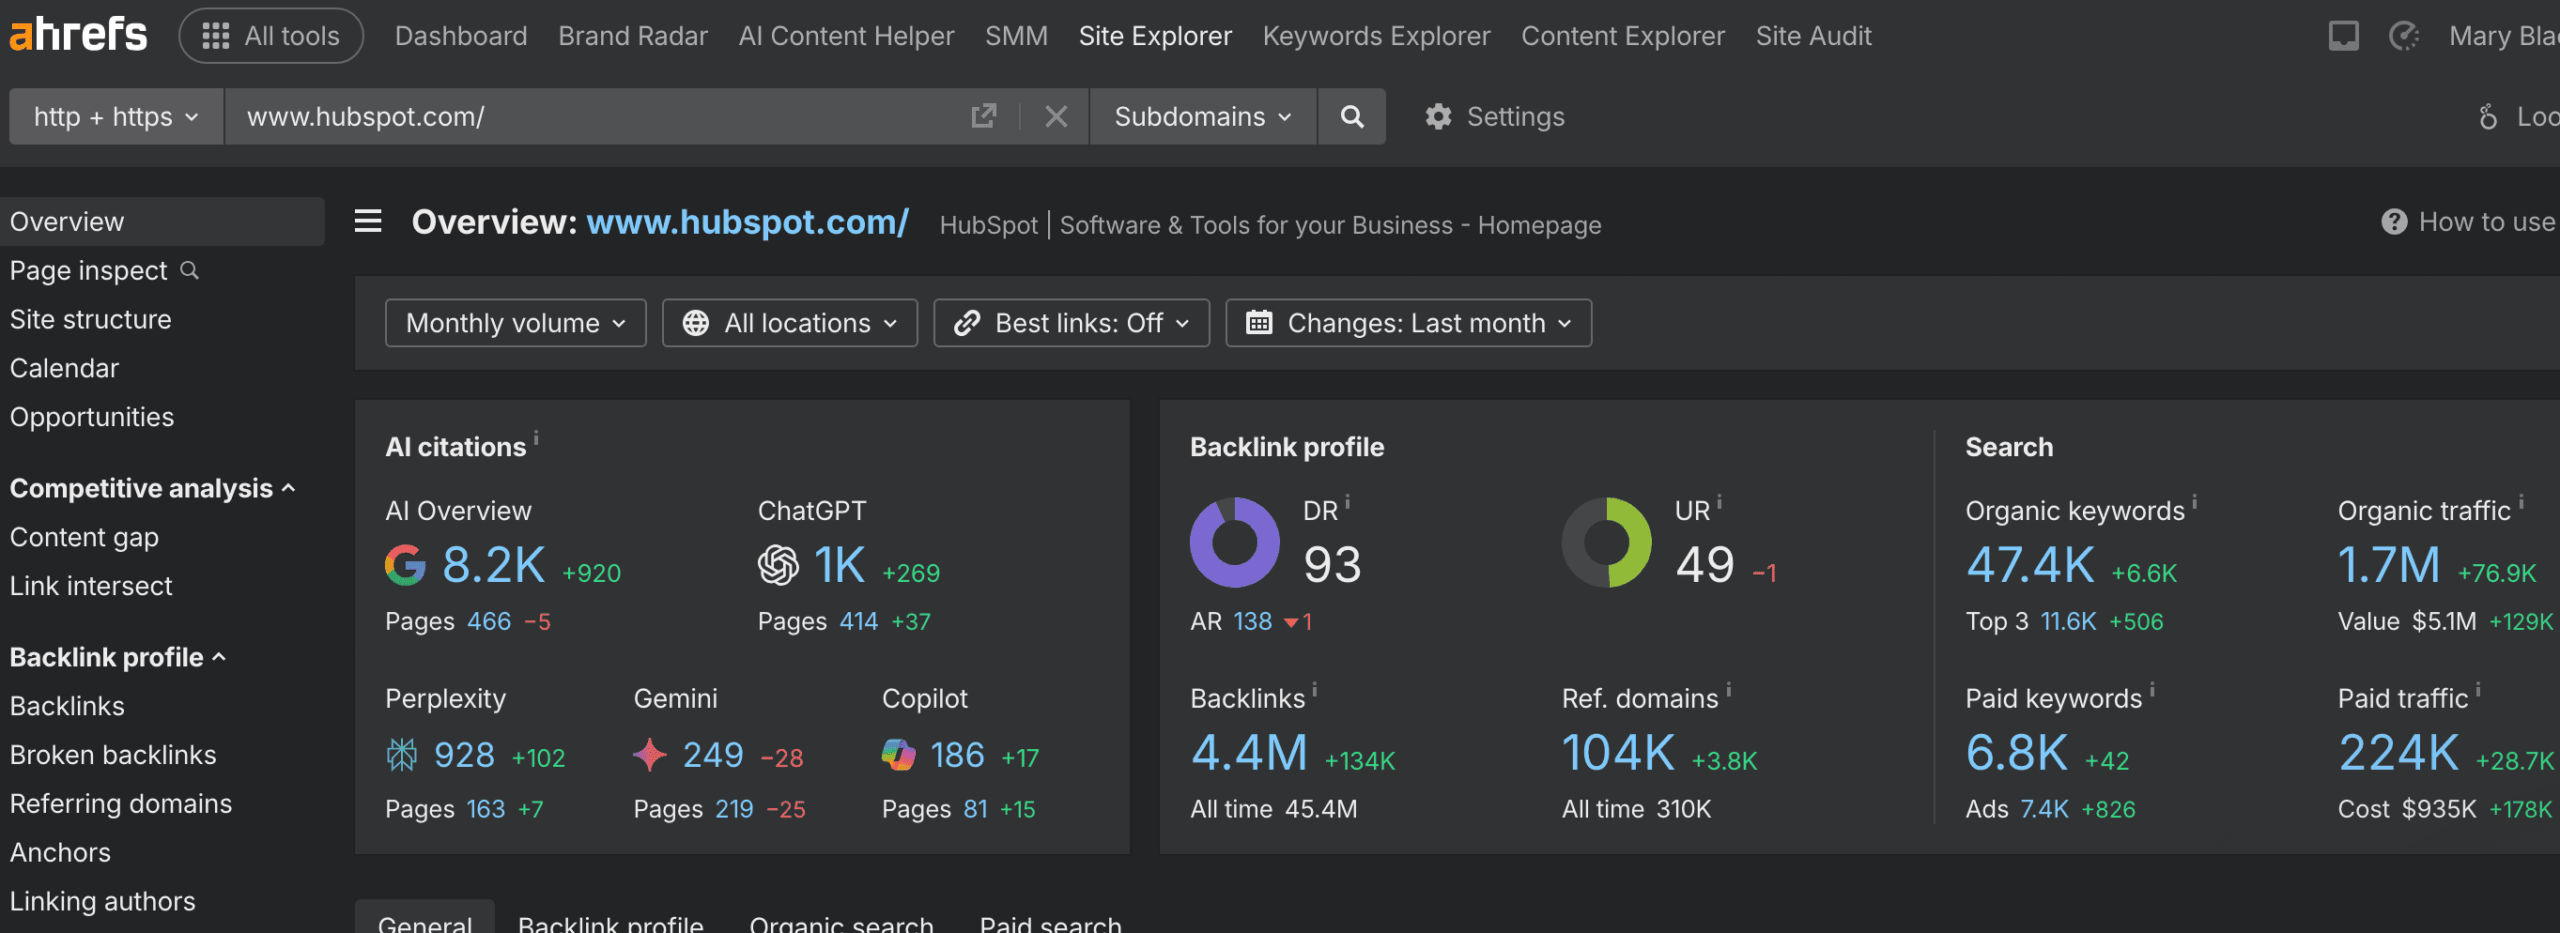
- Do a search in Google to see if the website accepts guest posts (because not every website does). If they do, see what the contributor guidelines are. Search for “[website name] + contributor guidelines” or “[website name] + guest blogging” or “[website name] + write for us”
For example, let’s say your target audience is SaaS companies. One potential website you could write a guest blog post for is the CRM platform, Hubspot (since they serve SaaS companies). Hubspot has a very high domain ranking of 93, according to Ahrefs:
If you search “Hubspot guest blogging” in Google, you’ll see the guest blogging guidelines pop up:
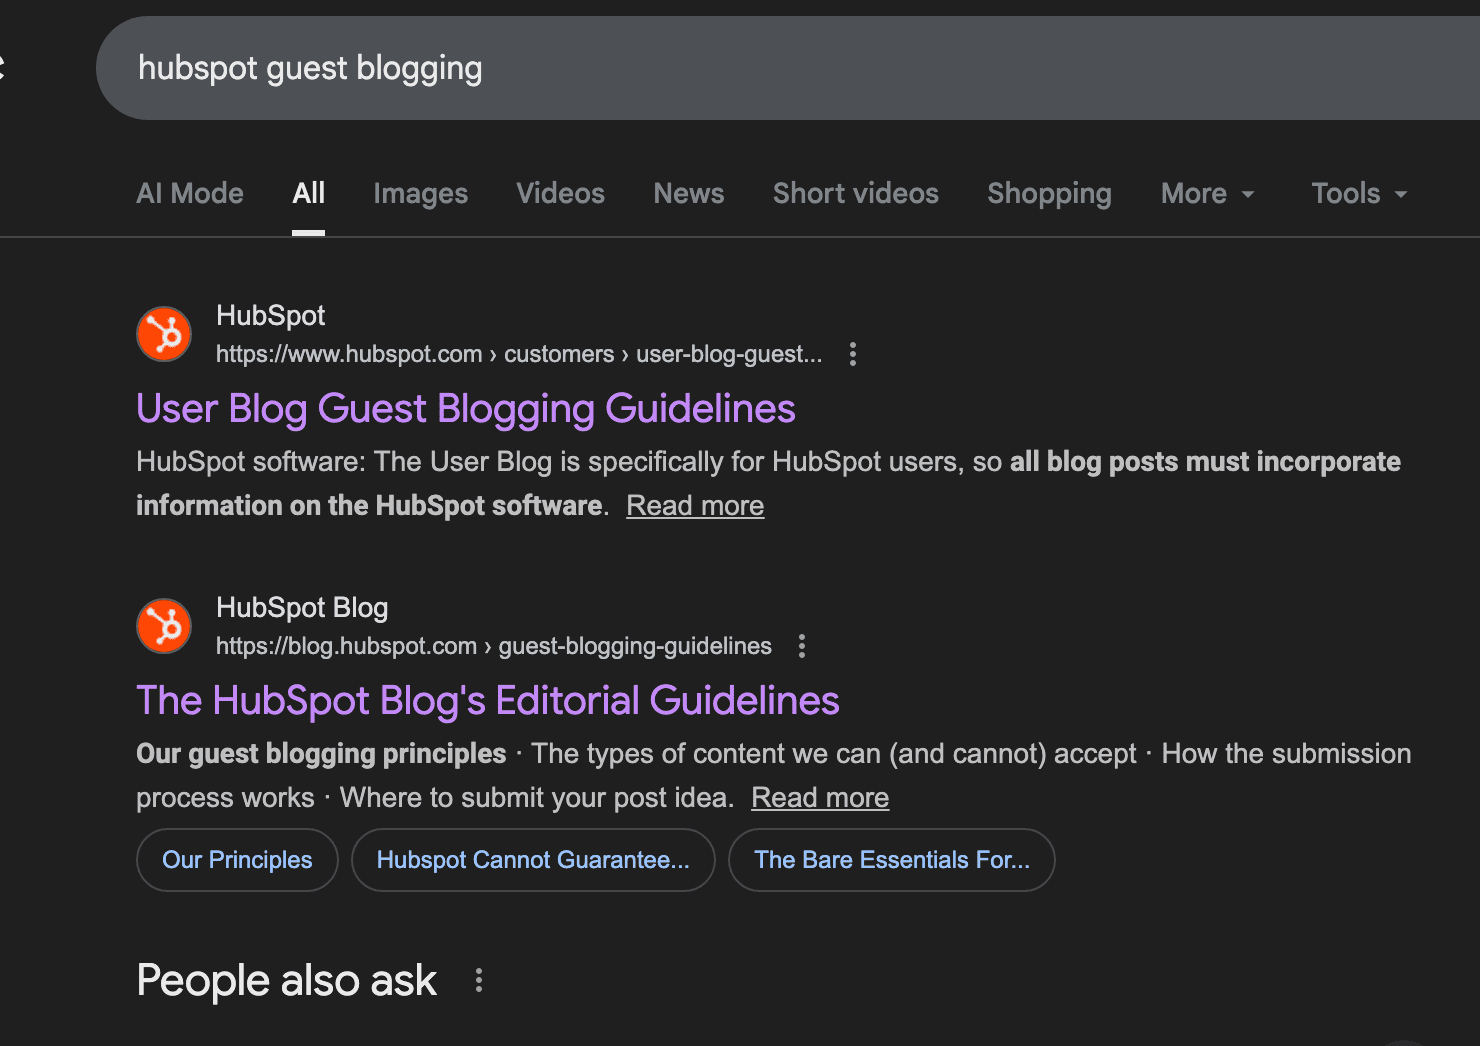
Great! So you know they accept guest posts. Now read the guidelines to see what they say. And write a winning pitch!
Podcasts
I like podcasts for a few reasons:
- Many people tend to listen to podcasts more than they read blog posts nowadays
- They’re more personable than guest blogging because listeners can actually hear your voice and get a feel for your personality
- They’re a low-effort way to get in front of your target audience (compared to guest blogging)
The domain authority of the website isn’t nearly as important as it is with guest blogging. Because with podcasts, the biggest benefits are audience exposure (people who actually listen) and networking with hosts — not SEO.
So how do you find the right podcasts to speak on?
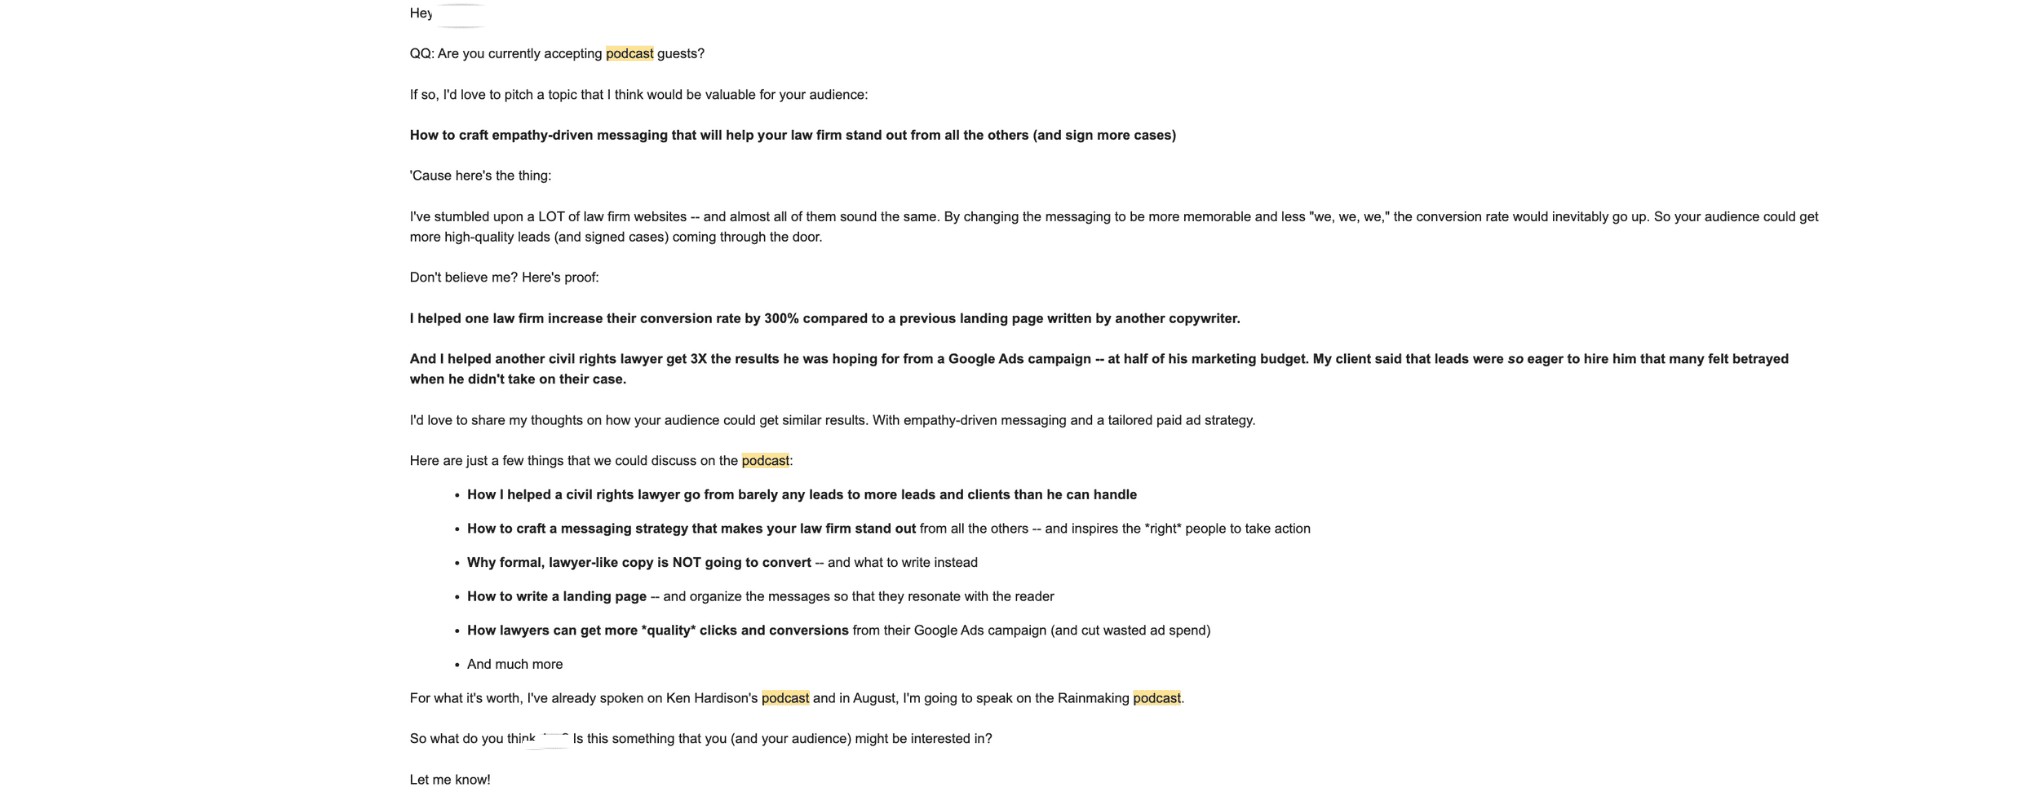
First, find shows that your audience listens to (ideally ones with a large number of downloads or reviews). Then pitch the host your topic, along with things you could discuss and why this would be interesting for their audience.
For example, here’s a pitch I wrote to somebody (that landed me a podcast interview):
Cold pitching with podcasts is much easier than cold pitching clients — most hosts are looking for great guests to be on their show.
An even easier route is to check Facebook groups like Podcast Guest Collaboration Community and Podcast #findaguest #beaguest or other entrepreneurial Facebook groups to find people looking for guests. I was able to land a spot on my first podcast this way!
You probably won’t get placed on your dream podcast right away. Start small and work your way up. It’s a bit scary the first few times you do it (at least it was for me) so it’s a good idea to practice on shows with fewer listeners anyway before targeting ones with a big audience.
I’m not great at improv lol so I always try to prepare by asking the host what questions they will ask (or providing them with the questions). Then I create a Google doc with answers to those questions written out.
Step 4 (if you’re freelance): Set up your business
That means:
Set aside money for taxes
Every time you get paid, pretend 30% of it was never yours and move it into a separate bank account. You’ll likely owe less in taxes but this way, you’ll have some left over at the end of the year and a bit of wiggle room just in case.
Set up systems and processes for your business (once you have them in place)
Systems and processes can help your freelance business run more efficiently. Things like:
- Outlining your processes and SOPs (standard operating procedures) for each project (I just use Google docs for this, but Trello or Notion work too)
- Tracking projects so you always know what’s happening (Google sheets works well for this)
- Tracking leads so you can follow up later with the ones that don’t become clients (I use Google Sheets for this too)
- Setting up a content calendar for blogging and social media (I use Notion)
Find the platforms and tools that work best for you. But don’t worry about this step too much. I’m definitely NOT the most organized person but over time, things have come together more.
Create a website that links to your services and shows off your skills
There are some freelancers that will argue you don’t need a website when starting out. I’ve even heard of some successful freelancers who have been in business for years without a website. But I’m a big believer in creating a website from the start. For several reasons:
- It looks more professional and legitimate. If you hire a freelancer, which one would you hire… the one with a website or the one without? Personally I would prefer to hand over my money to someone with a website. Much less likely to be a scam or take my money and run lol.
- It sells your services for you. You can talk about your unique process, how you’re different from other freelancers and what you offer in terms of deliverables.
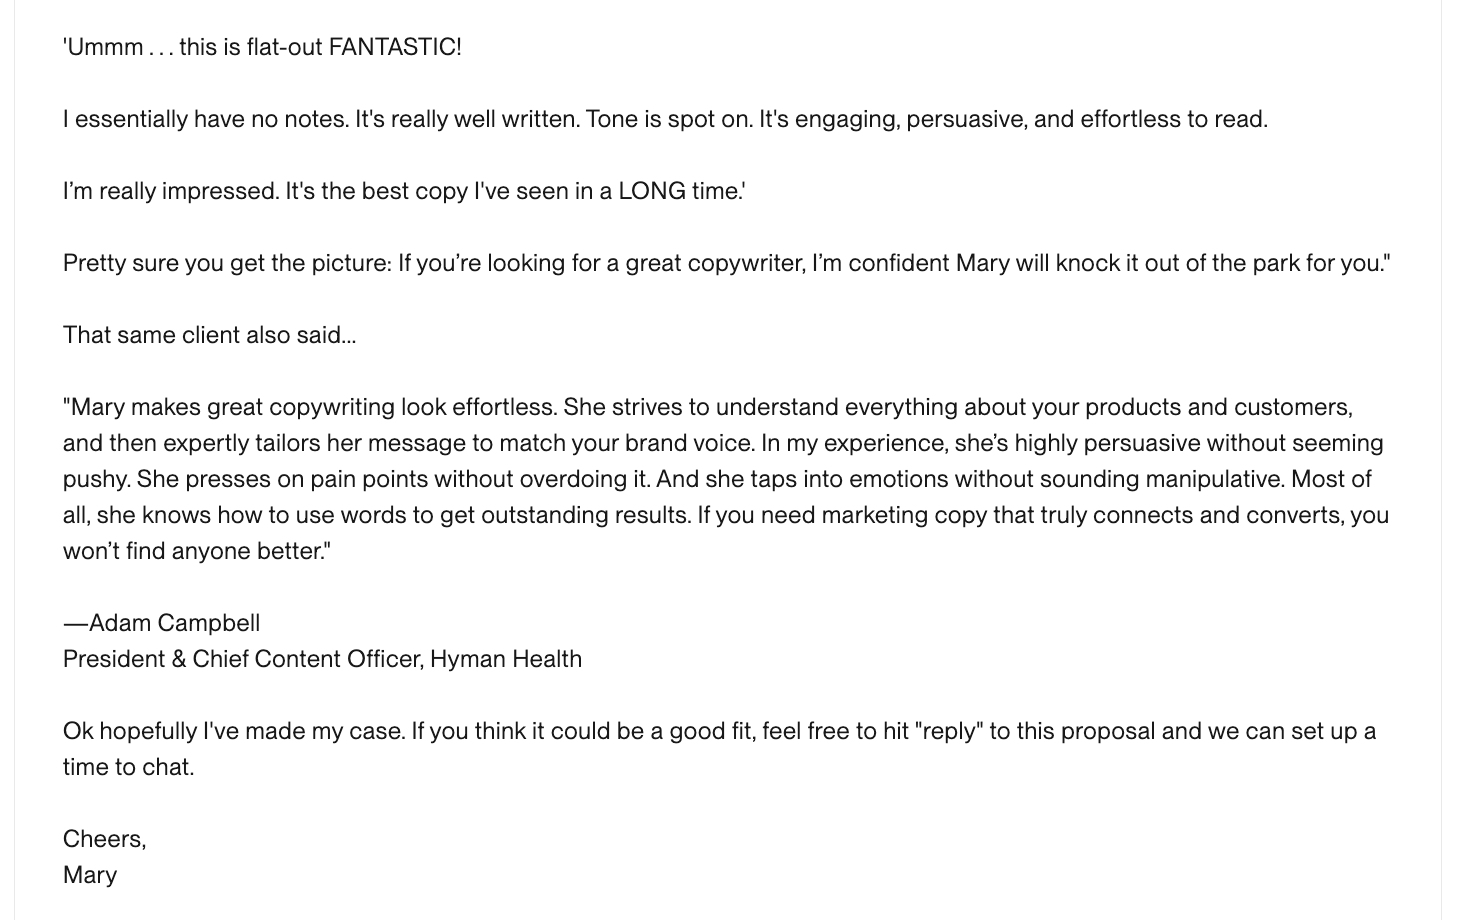
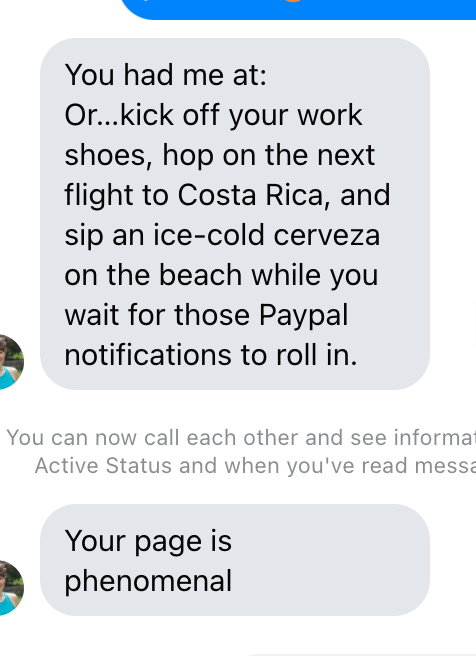
- It can act as your portfolio. When I was first starting out in copywriting, I was able to land clients without testimonials or a portfolio — simply because clients loved my website copy. Take a look:


Set up an S-corp
Once you’re making at least $40K-$60K, I recommend setting up an S-corp, since this will help you save money on taxes. Normally, as a freelancer, you pay self-employment tax on 100% of your profit (about 15.3%). With an S-corp, you pay yourself a salary and only pay taxes on that.
So let’s say you make $100K. As a freelancer or sole proprietor, you would have to pay a self-employment tax of 15.3% on the $100K (in addition to regular income tax). That comes out to about $15,300 in self-employment tax.
Whereas with an S-corp, you pay payroll taxes only on the salary you pay yourself — not on the full business profit. So if you paid yourself a reasonable salary of $60K, you’d pay payroll taxes on that $60K (about $9,180), and take the remaining $40K as distributions that aren’t subject to self-employment tax.
That said, you do have to account for S-corp costs like payroll service ($500-$1000/year) and accountant fees ($1000-$2000 per year), so the full savings on that income might be more like $3K-$4K per year. But still. Definitely worth it if you ask me!
I set up an S-corp because the taxes are much higher in Spain (where I’ve been living), so this allows me to lower my taxes since I only declare and pay taxes on my salary, rather than the full amount my business makes.
Step 5: Build a safety net (if you don’t have one already)
You definitely want to have some emergency savings in the bank before you start traveling.
How much?
Well, it depends where you go and how much you spend. But I would shoot for at least 3-6 months of living expenses.
Although, if you find that it’s cheaper to work from abroad than your home country (as is the case with me), then by all means, pack your bags and go! Just make sure to keep enough money saved for a return flight!
Step 6: Determine how you want to travel
Do you want to hit up a new country every month… every week? Travel half the year? Or only a few months?
As exciting as it may seem to go to a new country every month, it’s also exhausting (and expensive). When you stay in one place for longer, you’re able to get into a routine, be more productive and save money. Not just on flights but because you’ll obviously be able to get better deals on accommodation if you stay long-term.
Personally, I like to stay in one place for at least a month. Ideally longer. I currently live in Spain half the year and then spend the rest of the year traveling.
Step 7: Pick your first destination
When choosing a destination, you’ll want to take into consideration:
- Time zone
- Wifi
- Cost of living
- Weather
- Safety
- Community
- Walkability
- Coworking infrastructure
For example, when I travel, I look for the following:
- Sunny, warm weather
- A place that’s walkable
- A digital nomad community
- Infrastructure for remote work (like coworking spaces and cafes)
- Good wifi
- Safe
- A hospital nearby (or within an hour’s drive)
- Organic food/market
- Clean air
- Affordable (somewhere I can live comfortably for $2000-$2500 per month)
That said, it’s hard to find a place that checks all those boxes. Rio de Janeiro isn’t the safest place. But I LOVE it. So I just try to stay in areas that are relatively safe — like the Zona Sul — and (as my mom would always tell me) “have my antenna up” when out and about.

I recently arrived in Pipa and while it checks a lot of the boxes for me, it doesn’t have fresh, organic produce. There IS a weekly farmer’s market but the options are very limited and vary each week. They also sell out quickly since there’s high demand.
There isn’t a lot of infrastructure for working remotely either (like coworking spaces and cafes). There are a few options but not many.
And the air pollution is baaaaad because most of the cars driving through the center are old. Giving off so much exhaust you can literally see black smoke coming out of them!
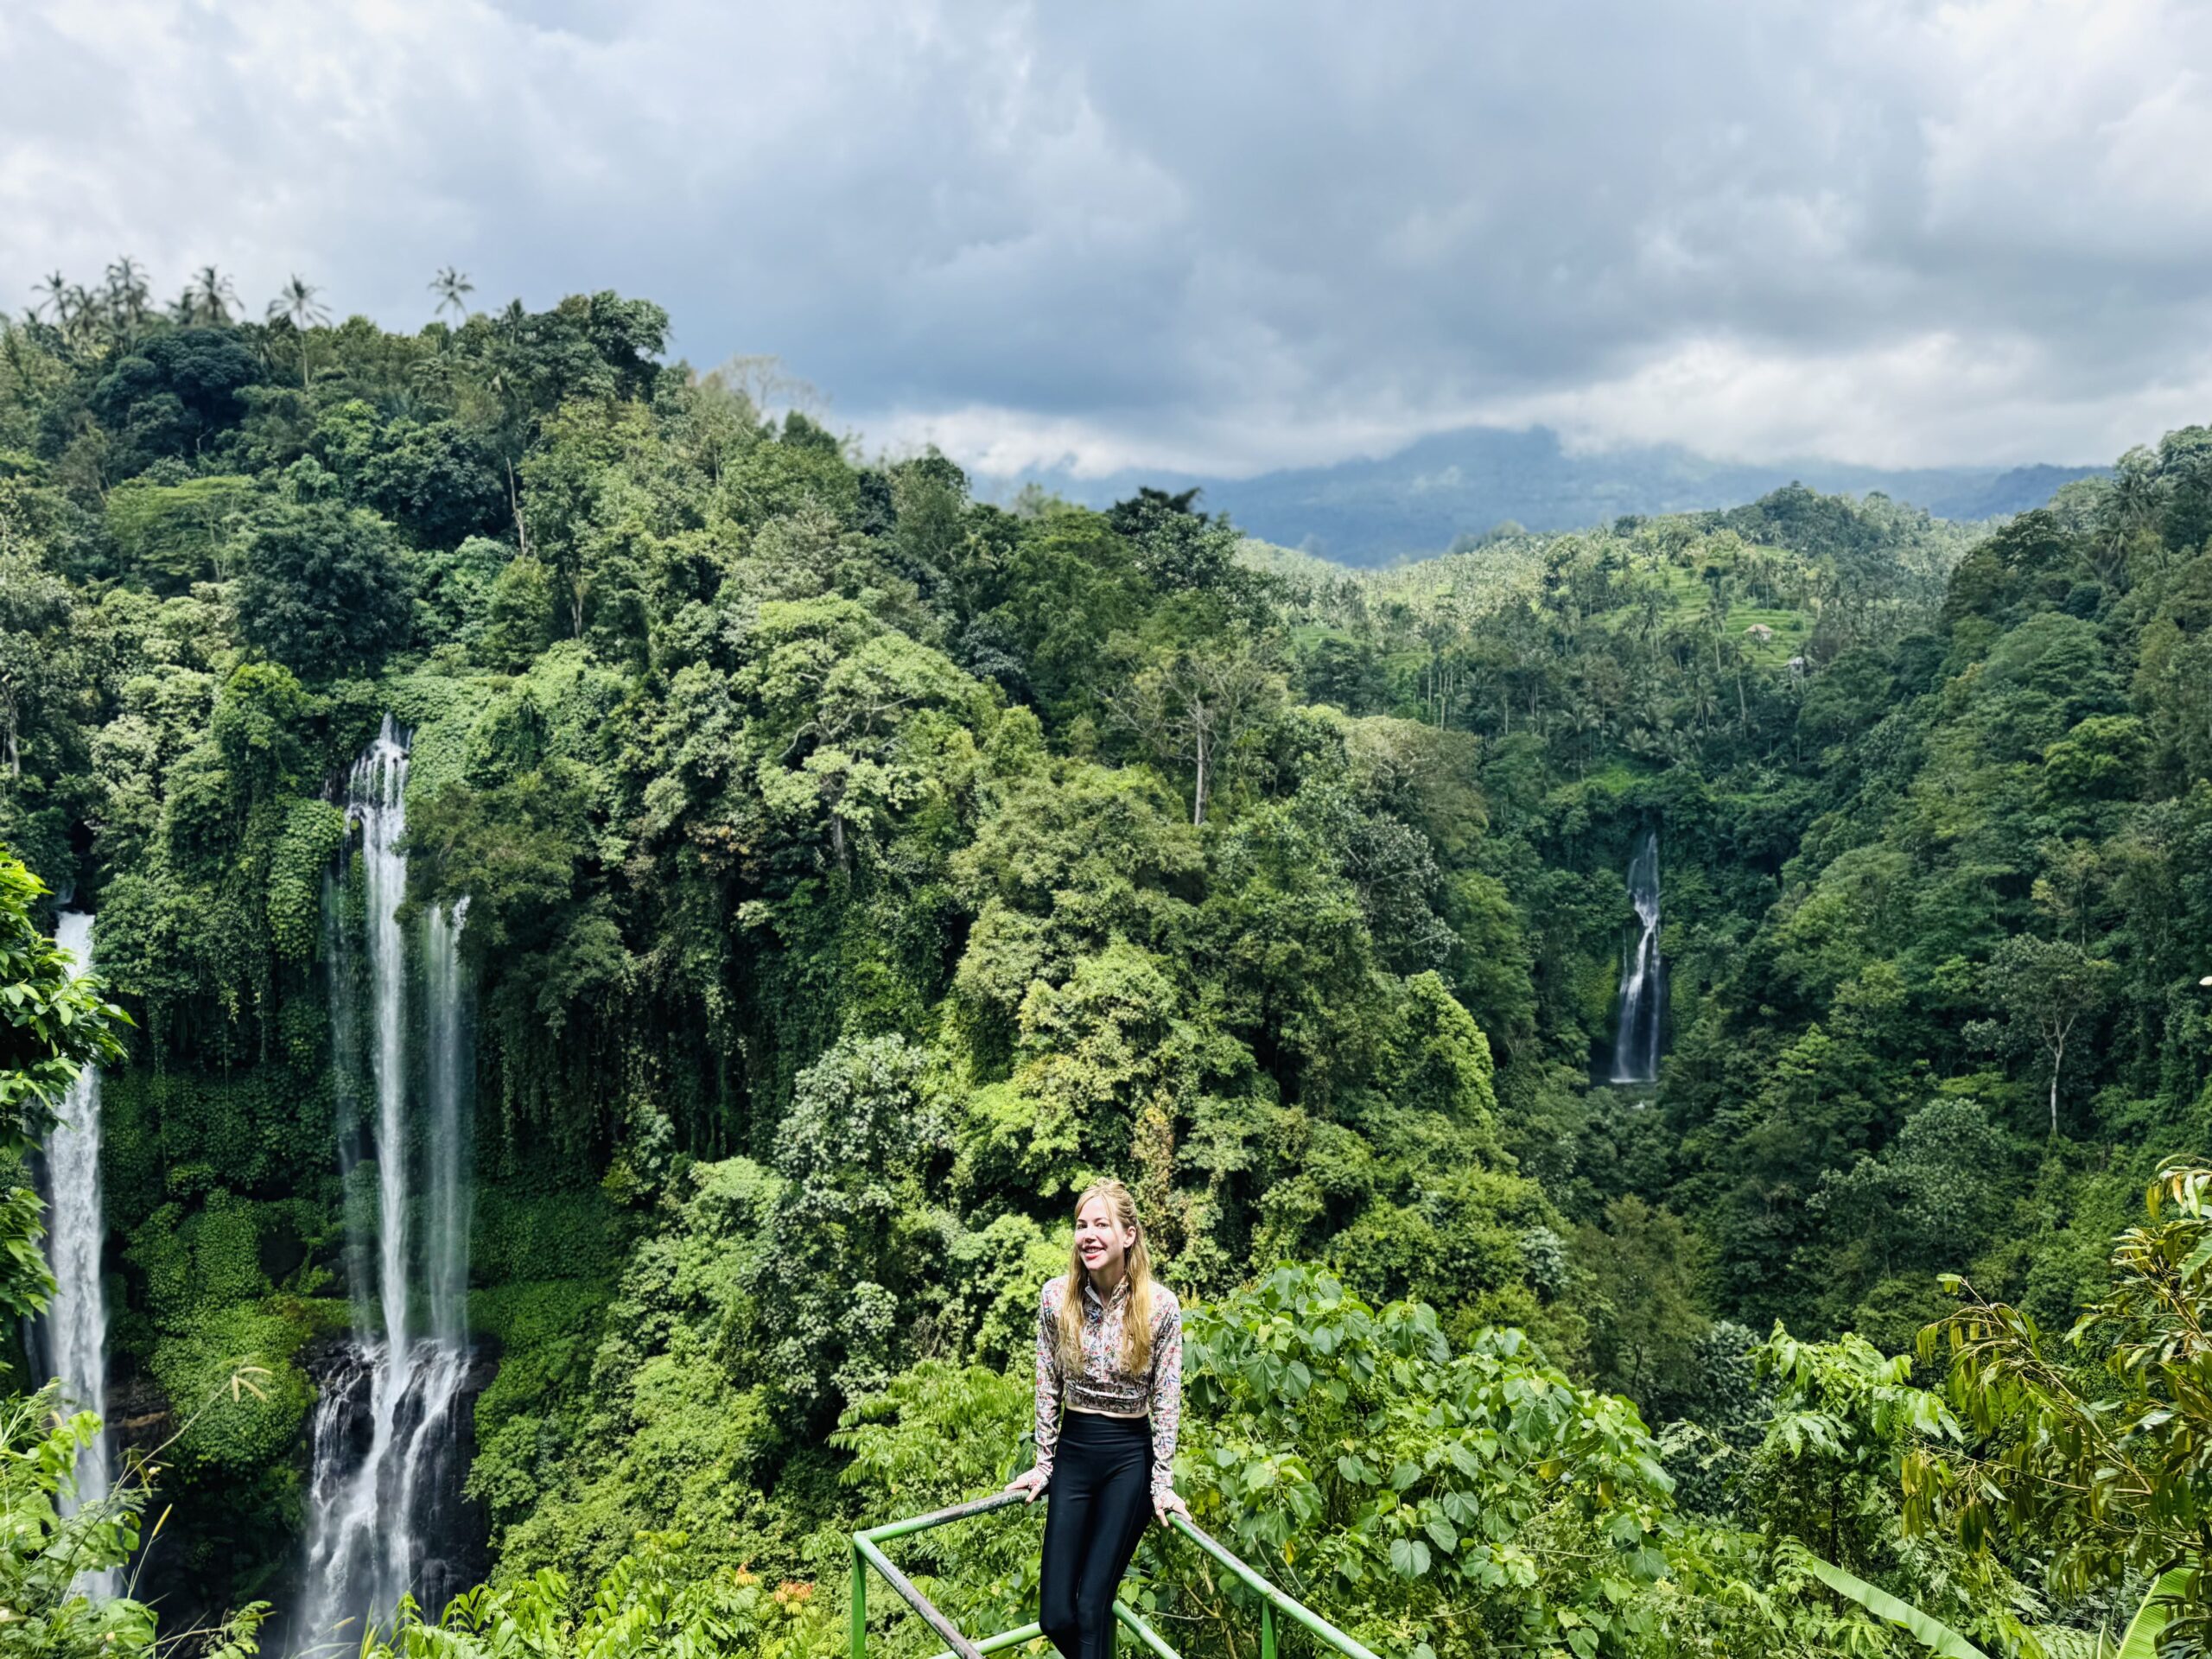
Sooo yeah. For those reasons I’ve decided to go to Florianopolis (in the south of Brazil) instead (I already checked and there are several organic markets close to where I’ll be staying lol). Plus, the beaches aren’t half bad either…
Another thing to think about is the time zone. Even if you’re freelance and don’t have to be “in the office” certain hours of the day, it can be hard when you’re working on a completely different time zone as your clients.
When I was in Southeast Asia, I found it psychologically very difficult to be waking up when my clients were going to bed and vice versa. So for me, that just isn’t sustainable long term.
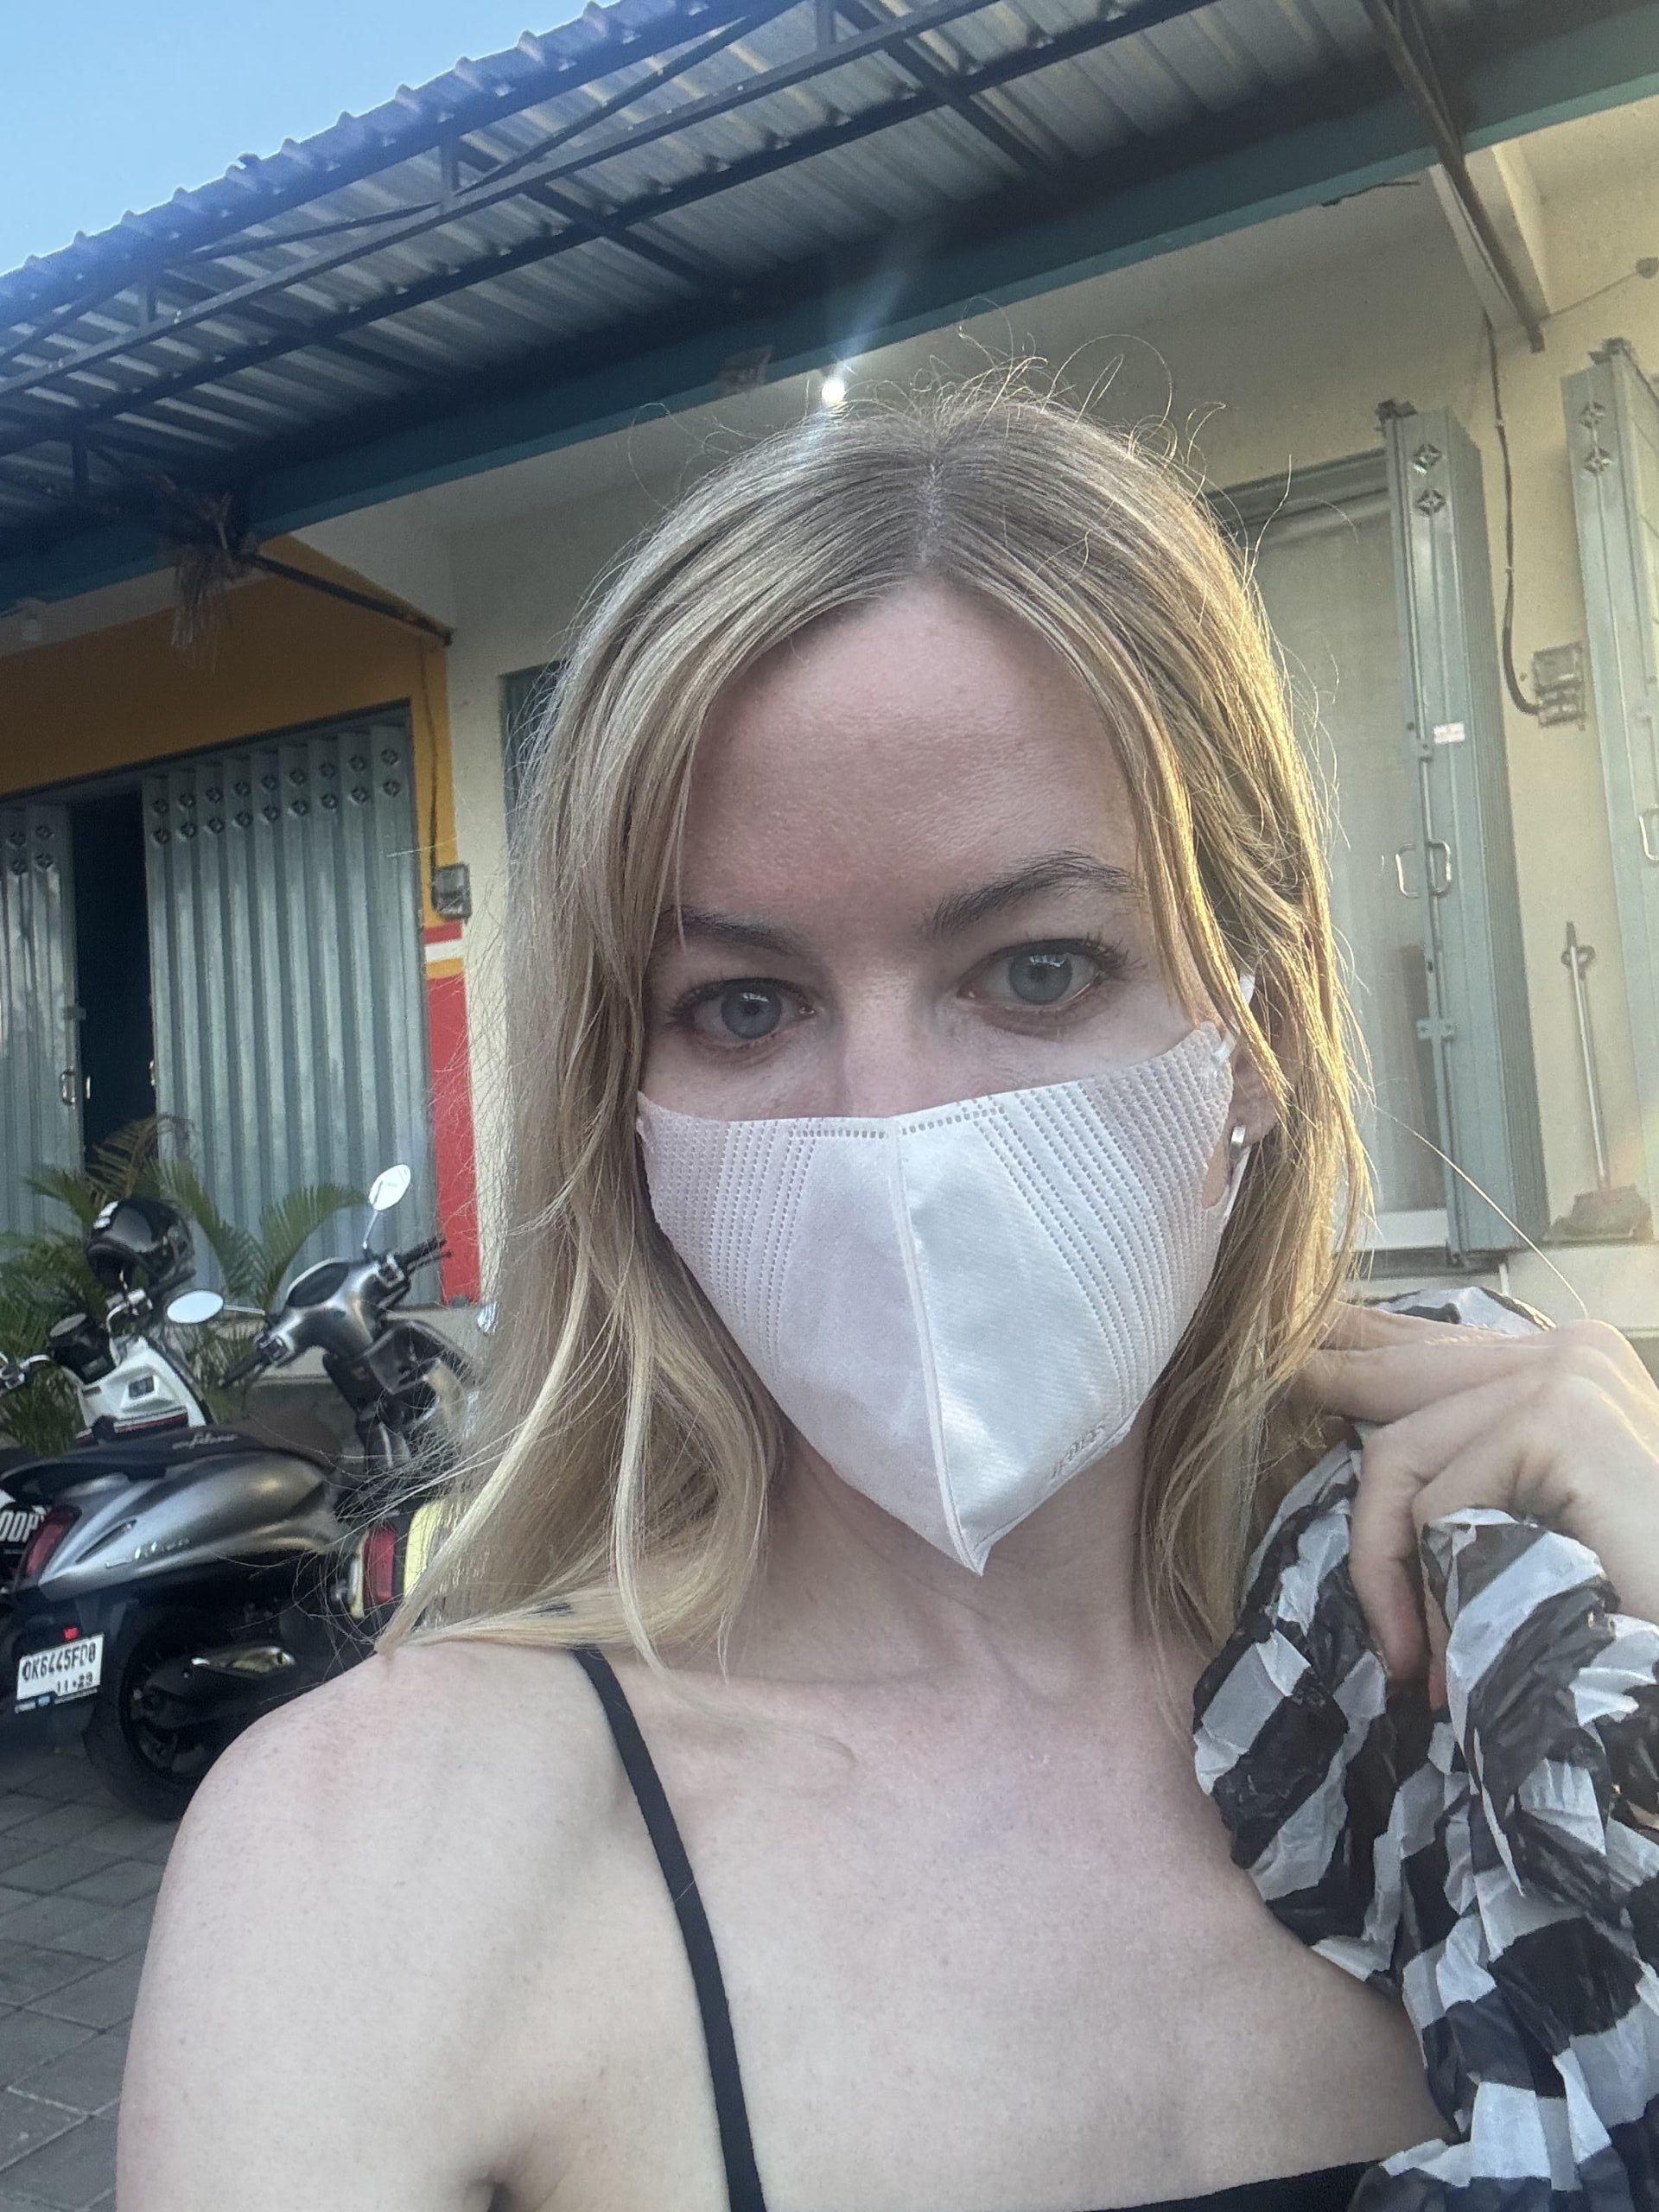
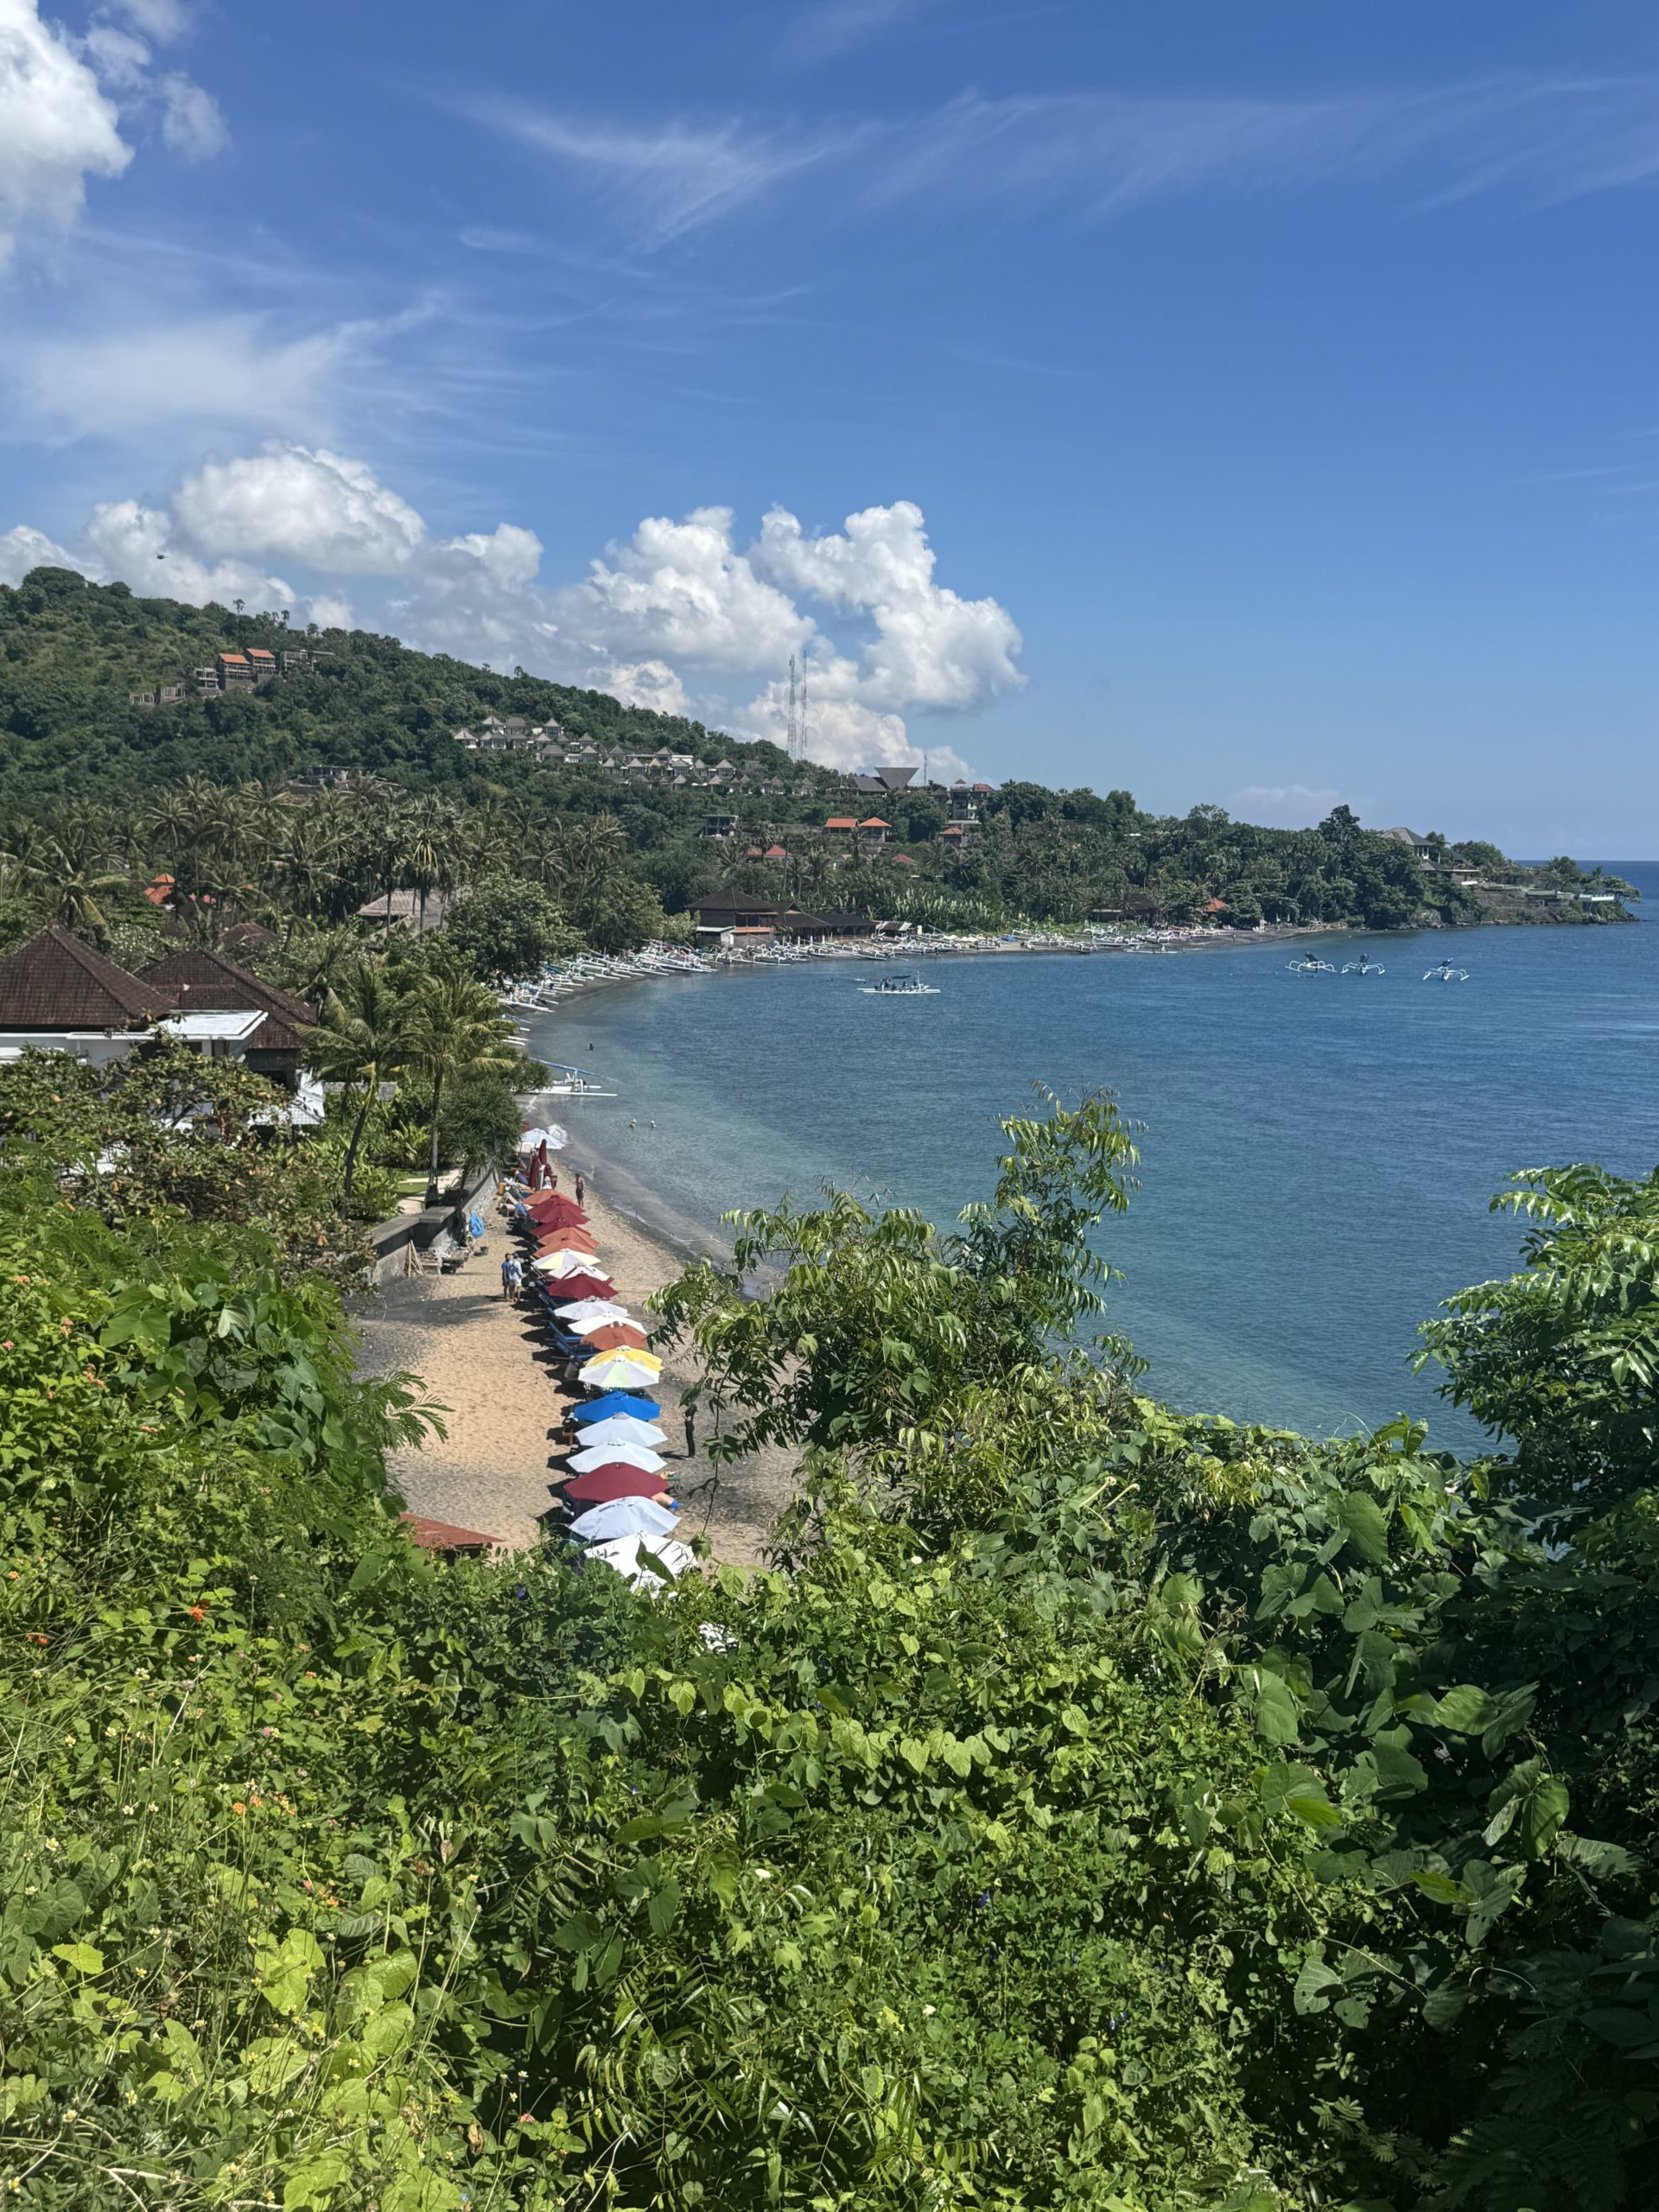
As much as I LOVE Southeast Asia, I couldn’t find organic produce in Vietnam either. Then I went to Bali for two months and while they did have organic produce (yay!), the traffic was terrible and the air quality was so bad that I ended up wearing a face mask around some of the time.
I spend a few days in Amed (in East Bali) and the air quality was much better there — but that didn’t have the community I was looking for or infrastructure for remote work (nor did it have an organic market). So it was nice to visit for a few days but not a place I would want to live or stay long-term.
Another reason I didn’t like living in Bali?
It’s SUCH a beautiful island with such kind locals and a rich culture. But it’s being destroyed by overdevelopment and mass tourism.
Digital nomads get to enjoy an amazing lifestyle in their poolside villas and trendy cafes. While locals have to deal with the rising cost of living and being pushed out of their homes and businesses to make way for bigger developers. It’s heartbreaking to witness and I honestly felt a bit guilty spending my money there.
TLDR; Some places might seem perfect on paper (or Instagram). But once you start living there, you see the full picture.
That said, here are some of the most popular digital nomad destinations:
- Da Nang, Vietnam
- Bali, Indonesia
- Chiang Mai, Thailand
- Pipa, Brazil
- Lisbon, Portugal
- Medellin, Colombia
- Florianopolis, Brazil
Pro Tip: Use a site like Nomads.com to find a destination and filter by criteria that’s important to you.
Step 8: Sort out logistics
Get your visa (if needed)
Check the visa requirements of the country you want to go to and how long you’re able to stay in the country for.
US citizens don’t currently need a visa for short tourist stays within Europe (or at least the Schengen zone). But starting late this year (2026), they will apparently need a European Travel Information and Authorization System authorization, which is an online travel permit.
Brazil has a reciprocal policy so they require Americans to have a visa just to enter Brazil. Meanwhile, Europeans can visit Brazil visa-free for up to 90 days.
Vietnam also requires Americans to have visas, whereas Europeans can visit Vietnam visa-free for up to 45 days.
Good news is that nowadays, e-visas are pretty easy to get.
When I went to Bali, I got a 30-day visa on arrival (so no prep needed). And then I renewed my visa (for an additional 30 days) online. I just had to fill out a form online and my visa extension was approved a few days later. Super easy.
BUT I saw on Reddit that the rules have recently been changed and now, in-person visits are required. If you don’t feel like dealing with the paperwork, you can hire a visa service to handle everything for you.
One more thing: When you’re entering a country, don’t tell the immigration officials that you’re “working.” If they ask what you’re doing in the country, keep it simple and just say “tourism.”
If you want to stay longer in a country, many countries offer digital nomad visas now. When I first moved to Spain, I got the non-lucrative visa (this was before the digital nomad visa existed). A few years later, I thought of transferring to the digital nomad visa. But then a lawyer told me that I would have to pay like 500 euros per month in “autonomo” (freelancer) fees. Umm no thanks!
Now I have permanent residency so I can live in Spain indefinitely — I just have to renew my residency card every 5 years.
If you want to find out how to move to Spain like I did, check out this blog post on how to move to Spain.
Get your other documents in order
Not to state the obvious, but make sure your passport and driver’s license are up to date (and not expiring soon). Take photos of them as well in case anything happens.
Get a bank card with no foreign transaction fees or ATM fees
Foreign transaction fees and ATM fees can add up quickly – which is why I highly recommend getting a card with zero foreign transaction fees and ATM fees (and good exchange rates). I use Revolut but Wise is a good option too.
Pro Tip: When paying for something with your card, always pay in the local currency (and allow your bank to convert the money for you). It’s much cheaper that way!
Get a travel credit card
With travel credit cards, you earn points or miles from spending. I’ve heard of some travelers who pay for everything on their card and are able to rack up enough points that they score free flights everywhere. Pretty sure you have to spend a lot to make that happen — but still better than nothing! Here are some of the top travel credit cards.
Get global health insurance
Emergencies happen so you definitely want to have some type of global health insurance. I personally just use my health insurance in Spain since it covers up to 30,000 euros abroad for emergencies.
I once had a $300 eye doctor visit in the US and my insurance company reimbursed me in full for that. In Bali, I had a $500 skin biopsy done and they also reimbursed me for that. I suppose I should have something that provides more coverage in case of emergency… but until now, it’s been enough.
If you want more coverage, I highly recommend getting global health insurance. Some popular options (that I haven’t used) include:
Keep a permanent address (or get a virtual one)
You’re going to want some sort of permanent address for things like taxes, banking and other paperwork. I use my dad’s address in Florida, but if using a family member’s address isn’t an option, you could try Dakota Post. Haven’t used it personally but this person on Reddit recommended it. Apparently they let you become a resident of South Dakota and reap the tax benefits.
Other options: Anytime Mailbox and US Global Mail are other options (also recommended in that Reddit thread).
Get a virtual phone number
If you’re American, you’ll need to keep a US phone number so that your US bank or other US-based platforms can send you verification codes. I’ve been using my brother’s phone number for years (although can’t say I recommend this lol).
I’ve heard that Google Voice is a good option (but you need to set it up inside the USA). In this Reddit thread people say good things about Tello and Tossable Digits.
Use a VPN
This isn’t a must per se but it’s definitely handy to have as a digital nomad. Here are some instances where you might find it useful:
- Access content that’s restricted by region (like streaming services, websites or apps that only work in certain countries)
- Check ads and search results in other markets or regions if you work in marketing, SEO or paid ads
- Extra security on public Wi-Fi in cafés, airports, coworking spaces, and hotels
I use NordVPN and it does the job for me.
Step 8: Book your accommodation
Now that you know where you want to go, it’s time to book your accommodation!
Here are a few different types of accommodation you can choose from, depending on your budget, how long you’re staying and how social (or not) you want to be.
Private rental (like Airbnb)
This is usually the easiest option. I normally book an Airbnb for one month and then if I stay in the place for longer, find cheaper accommodation elsewhere (or try to negotiate with the host for a better rate off the platform).
You could also try Facebook groups in the city where you want to go (like “Apartments for rent in [name of city].” But I haven’t had much success this way. If you go this route, I highly recommend visiting the place in person beforehand -– and definitely don’t pay for the accommodation without meeting the person first!
Pro Tip: Before booking a place, always ask the host for a discount. Normally they’ll be able to offer some sort of discount, even if it’s just 5%. I recently was able to get like $300 knocked off the monthly price simply by asking the host for a discount.
Also, check to see if you can find the place on other sites, like Booking.com. Sometimes it’s cheaper than Airbnb. Or if the listing includes the name of the place, even better. You can Google it and book directly through the site which will almost always be cheaper.
Pet sitting
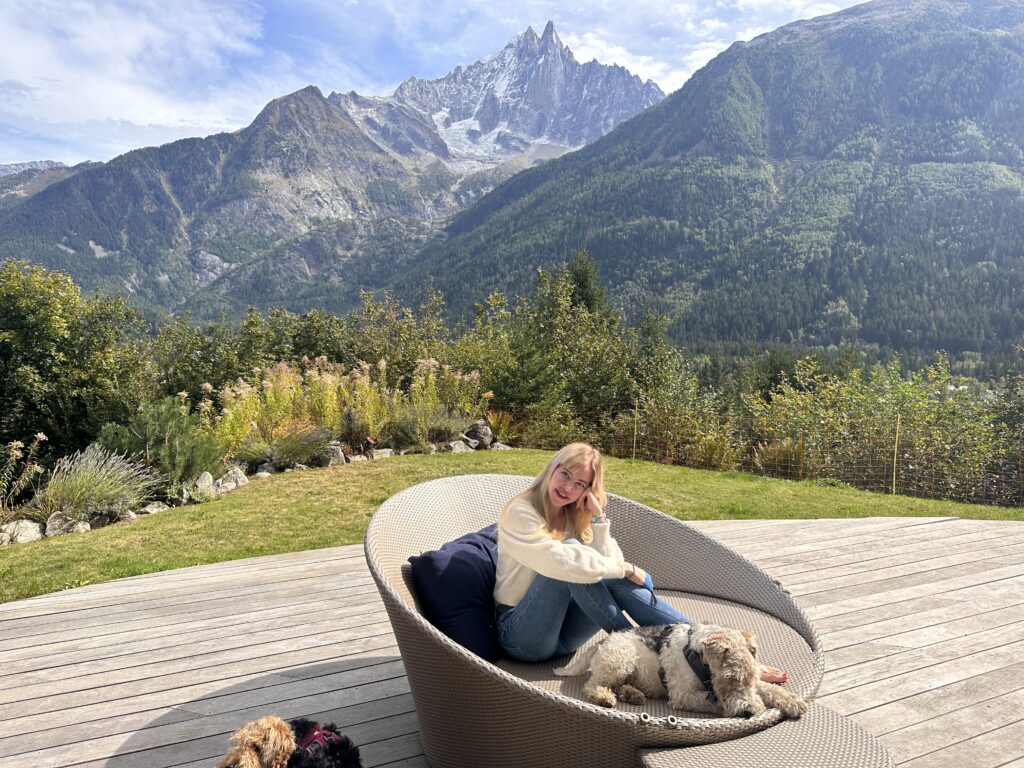
If you’re an animal-lover like me, I highly recommend pet sitting in exchange for free accommodation through a platform like TrustedHousesitters.
This is the main way that I travel nowadays (especially around Europe). I’ve been able to stay in AMAZING, luxurious homes for free that I otherwise couldn’t afford to stay in. Take a look:
If you want to find out more about TrustedHousesitters, here’s a blog post I published on everything you need to know (and how to land the best sits).
If you want to join, here’s a link that gives you 25% off your first year.
Houseshare
If you’re open to having flatmates, a houseshare can be one of the more affordable options (other than pet sitting of course). When lived in Medellin, Colombia, I found a houseshare in a duplex apartment with three other guys through the digital nomad Facebook group.
I had my own bathroom and the house had an amazing rooftop terrace and treadmill.
We also had cleaning service once per week and a chef who cooked all of our meals for us.

All of that for $1,000 per month (including all of the ingredients for food). So not super cheap or anything. But considering that covered the cost of food, chef, cleaning and accommodation… not bad either.
If you’re interested in a houseshare, check out Airbnb. Or Facebook groups in the location you’re interested in going to. With Facebook, you’ll normally get much better prices than Airbnb.
You could either search for the digital nomad or expat Facebook groups… or more local ones in the native language of wherever you want to go.
For example, in Medellin, there is the Alquiler de habitaciones en Medellin Facebook group and the Digital Nomads Medellin Facebook group.
A few months ago, I had to rent a room in Barcelona for two weeks (since I was subletting my studio). I checked Airbnb and the cheapest room I saw was for 784 euros. Then I looked in the Facebook groups and was able to find a room for just 450 euros!
Co-living
If having a built-in community is really important to you — and you like the idea of living and coworking in the same space — co-living could be a great option.
Most co-living spaces give you a private bedroom (sometimes with your own bathroom), plus shared kitchens, lounges, and an on-site coworking area. Many also organize weekly dinners, yoga and other events so it’s really designed around meeting people and building community.
Some popular co-living brands you’ll see around the world are Outsite, Selina CoLive, Sun & Co, and Roam. These are usually set up in popular digital nomad hubs like Portugal, Spain, Mexico, Bali, and parts of Latin America.
Personally I’ve never stayed in a coliving because they are quite pricey. Ranging anywhere from around $800 to $1,800+ per month depending on the location and season.
Hostel
If you’re on a tight budget and/or you want to meet fellow travelers, you could stay in hostels. I did this when traveling around Thailand a few years ago. Because my friend and I were traveling around every few days (during the high season), we couldn’t get a good deal on accommodation. And I wasn’t willing to shell out $50/night on a hotel. So we ended up staying in hostels.
Although now (at age 39), I’m not sure I would do it again lol. I need my privacy and a good night’s sleep! It can also be hard to get work done when there’s always people around/a party going on.
Some hostels have more of a party vibe while others are quieter. Check out the photos and reviews to get an idea of what it’s like. I once stayed in a hostel in Thailand where I shared a room with super obnoxious 20-something year olds who barged into the room in the middle of the night and made a lot of noise. That, on top of the music thumping through the walls all night (music that even earplugs couldn’t drown out) did not make me a happy camper.
Before booking your accommodation, here are some things to ask yourself:
-
- Is there a good work setup with a comfortable chair and desk to work from?
If not, you might end up having to pay for a coworking space or working from cafes all the time which can get pricey… and isn’t always great for productivity — or taking work calls )
- Is there a good work setup with a comfortable chair and desk to work from?
-
- Does the bed look comfortable?
You can tell a lot by the photos… if the edges of the bed look rounded, that’s a good sign!
- Does the bed look comfortable?
-
- Is the room dark, cool and quiet?
This is huge! Look for blackout curtains or shades, air conditioning (if you’re in a hot place) and read reviews for comments about noise.
- Is the room dark, cool and quiet?
-
- Is the wifi good?
Don’t be shy about asking the host for the actual download speed. “Fast Wi-Fi” can mean different things depending on the country.
- Is the wifi good?
-
- Is the location walkable?
Are you close to a supermarket, cafés, and restaurants? If not, how far are you from basic things? Uber and food delivery can add up fast.
- Is the location walkable?
-
- Is it safe and comfortable to walk around at night?
Especially important if you’re traveling solo. Check Google Maps to get a feel for the area and ask the host (or whoever you’ll be staying with) if it’s safe to walk home alone late at night.
- Is it safe and comfortable to walk around at night?
-
- Are there any deal-breakers in the reviews?
Check for things like loud neighbors, construction, weak water pressure, mold or anything else that would make it difficult to live.
- Are there any deal-breakers in the reviews?
-
- Is there a washing machine in the building or apartment?
If not, ask the host how you can do laundry. In Mexico and Bali, for example, it’s super common (and cheap) to take your laundry to a drop-off laundry service. In Brazil… everyone does their laundry at home or at a self-service laundromat.
- Is there a washing machine in the building or apartment?
-
- Does the place fit your lifestyle?
For example, do you cook at home a lot? If so, you’ll probably want a fully equipped kitchen. Do you go to the gym? Make sure there’s a gym close by.
- Does the place fit your lifestyle?
Step 10: Book your flight
I always use Google Flights to check rates across the board and the cheapest time to travel.
Here are a few things to think about when booking your flight — things that I learned the hard way!
Baggage allowance
That super cheap flight might not include a carry-on — and paying for bags (especially last minute) can make the flight way more expensive than it seems.
When I was traveling from Da Nang, Vietnam to Bali, I got to the airport and the airline staff at Batik Air told me that because my carry-on bag was overweight, I had to pay an additional $300. Yup, $300!!!! For my backpack. Insane. I couldn’t believe it. That was more than the cost of my flight! I’ve traveled extensively around Europe and never paid more than 80 euros for luggage — even last-minute with budget airlines like Easyjet.
So I was pissed. Out of principle, I chose not to fly with that airline and booked a flight with another airline (Malaysian Airlines) which had an overnight layover. It ended up costing me about the same (or a bit more) — but at least I didn’t have to pay anything for my bag!
This whole situation could have been avoided if I had checked the baggage allowance and weighed my bag before going to the airport. Or at least purchased a checked bag in advance.
Total travel time
This one’s obvious but look at how many connections there will be and how long each connection will be. The 12+ hour layovers are normally better than 7-hour ones because at least then you can leave the airport.
I try to book flights with the shortest travel time possible within my budget. Even if it costs a bit more, I’ve found it’s worth it for my sanity.
Overnight layover
I once booked a flight to Argentina that had an overnight layover in Lima, Peru. I’m pretty sure I had to pay twice for my checked bags. And I had to pay for a hotel. The whole flight probably ended up costing me more than it would have if I had just booked a flight without an overnight layover.
Even if you don’t have to shell out for a hotel, the overnight layovers can take a toll. When I was coming back from Bali, I had a 7.5 hour overnight layover in Dubai. Not enough time to leave the airport but too much time to just sit there.
Lemme tell you… it. was. Miserable. I was SO exhausted and just wanted to get home. In the future, I will try to avoid those overnight layovers at all costs.
Food options
Most long-haul flights (ie: 6+ hours) serve at least one meal. But if you take a budget airline, they might make you pay for all meals onboard.
I recently flew Level from Barcelona to Miami and didn’t realize that there was no meal included in my ticket. Fortunately the flight attendant was nice and gave me one of their leftover meals for free. Otherwise I would have had to shell out like $10+ for a small plate of food.
If you have specific food preferences, be sure to specify this ahead of time online — some airlines can accommodate more than others.
Change fees
Plans can change last minute — especially if you’re fickle like me! I’ve lost a lot of money over the years on flights that I’ve bought but not taken. I’m still too cheap to pay for flight insurance lol but if you think there’s a high probability of your flight changing, it’s probably worth it. Or at least check what the change fees are before booking with that airline.
Step 11: Pack your bags
Funny story. When I was 18 years old, I travelled to Nice, France for 3 weeks with one of my best friends from high school. We had a layover in Zurich and I had not one, but TWO massive suitcases that I had to roll down cobblestone streets and lug up flights of stairs. I don’t know WHAT I was thinking.
I’ve since learned how to travel a lot lighter. Mostly because I don’t want to pay for luggage lol.
Nowadays, I fit everything into my two Osprey backpacks:
- Fairview 40L (my big “carry on” backpack)
- Daylite backpack (my small “personal item backpack)
The big one is designed as a carry-on (to fit in overhead compartments) and the small one is designed to fit underneath my seat.
Both are Osprey. They’re my favorite backpack brand because not only are they super durable, but they have a lifetime warranty. So if anything happens (and I mean ANYthing), they will fix or replace it for you. Free of charge.
I’ve heard some crazy stories in regards to their return policy. Like this person whose backpack fell off a motorbike and got damaged. She returned it to Osprey and they sent her a brand new backpack 4 weeks later!
Alright, so what should (and shouldn’t) you bring?
Well, it obviously depends where you’re traveling to. But here are my top essentials:
Clothing (for tropical places)
Even when I try to pack light, I normally have a pile of clothes that I never end up wearing. By the end of the trip, I’m thinking “ugh, why did I pack that?!” Seems to happen every time.
To avoid that as much as possible, I try to pack things in solid colors that I can layer or mix and match. For example…
❌ a polka dot dress that I might only wear once or twice
✅ A long-sleeved white linen shirt that goes with everything
In addition to linen tops and pants, I love jean shorts as well because they go with everything.
If you’re fair skinned like me (or you just want to protect yourself from the sun), sun protective clothing is a must-bring as well. Not only does it make it less stressful to be in the sun because you don’t have to worry about reapplying or missing a spot, but you’ll also save a lot of money on sunscreen (which can be expensive in certain countries — especially if you buy mineral sunscreen).
As far as shoes goes, I normally pack my Birkenstock sandals (since they go with everything and I can walk for miles in them) and one pair of comfortable sneakers I can walk for miles in, like On’s. That’s it.
Funny story: I’m currently staying in this little beach town in Brazil and most people wear flip flops here everywhere. I wear my On’s because I’ve been doing a lot of walking here (averaging around 15K steps per day) and can NOT walk for miles in my flip flops.
A couple of nights ago I was at a samba party and chatting with this guy outside. He looks down at my shoes and goes “Oh my God. Your SHOES” in complete horror.
Yeah, yeah. I know they aren’t the best looking shoes. And now they definitely need a good wash. But hey, at least they’re comfortable.
Although after that, I promised myself I would go out and buy a pair of knockoff Birkenstocks that look halfway decent with clothes lol (since I left my originals in Barcelona).
Electronics
In addition to the obvious (like my phone, laptop and chargers), I also pack:
- Kindle
- Anker laptop power bank (this is much heavier than your typical power bank but it’s handy if there’s a power outage or I want to work from somewhere where I can’t plug in my laptop – like the plane or a beach bar without outlets. It also charges phones and pretty much anything else)
- My GoPro (if I’m traveling somewhere where there’s good snorkeling)
- Bose noise-cancelling headphones (These are a total game-changer for long-haul flights. They drown out a lot of the noise. And they last foreeeeever. I’ve had mine for like… a decade now? And they’ve still held up well. I just have to replace the earphone pads every now and then.)
Other
- Tripod (so I don’t have to ask strangers to take pictures of me lol)
- Snorkeling gear (again, only if I’m going somewhere with good snorkeling)
- Slip silk eye mask + ear plugs (essential for a good night sleep!)
- Slip silk pillowcase (great for keeping your hair and skin soft)
- Coolibar wide brim sun hat + sunglasses
I’ll update this soon with a more comprehensive packing list!
Step 12: Get settled
Whenever I land in a new destination, it always takes me a few days (or a week) to get settled.
Get a SIM card
My first focus is on finding a SIM card. Just make sure your phone is unlocked so you can do this!
You can normally pick up a SIM card at local convenience stores or phone carrier shops. Most airports sell them too but they tend to be more expensive there.
If you have a US iPhone, you may find that they only allow eSims. This can be a bit of a pain because in most countries (at least in Thailand, Brazil, and Spain), you have to go to specific carrier stores to get your eSim. When I was in Thailand, my friend with a normal phone could walk into any store to get a SIM card whereas I had to go all the way across Bangkok to get one. It also cost me more.
Some phone carriers will try to convince you to sign up for a plan with them – and tell you that this is the cheaper option – but don’t fall for this trap. The one time I did this (in Spain – with Orange, a reputable company), I was charged for things that I didn’t agree to and even services I didn’t use. It was a huge hassle to get reimbursed (but finally they did).
The problem with these plans is that if you go over your coverage limit, they will charge you (often without warning). And you could be left with a hefty bill at the end.
A much better (and cheaper) option are “prepaid” plans, where you pay ahead of the service and when it runs out, it runs out.
If your phone supports eSims and you don’t want to deal with the hassle of getting a SIM card in person, you could also try services like Holafly or Airalo which allow you to do everything online. But these tend to be pricier than buying a local eSim.
Whatever plan you get, make sure you have enough data so your SIM card can be a backup in case your wifi cuts out or you’re on the go and need to connect.
Find places to work from
Maybe you prefer to work from home, in which case, you can skip this step. But if you like to get out of the house to work, you’ll want to find a coworking space or cafes to work from.
Here are things I look for in a cafe or working spot:
- Good wifi (duh)
- Comfortable seating with cushions
- Outlets
- Remote-friendly environment (because not every place is, especially in areas that don’t have a lot of digital nomads)
- Bonus: Pretty decor or nice view
Pro Tip: If you type into Google Maps “work from,” remote-friendly cafes and restaurants will pop up.
Step 13: Find your (nomad) community
Nomad life is way more sustainable (and fun) when you have friends around who are in the same boat with you.
Here are the few ways that I meet people when traveling:
- Bumble BFF
- Couchsurfing hangouts (you have to download the app to use it)
- Meetup.com
- Local Facebook groups and Whatsapp groups
- Coworking spaces (some are more social than others)
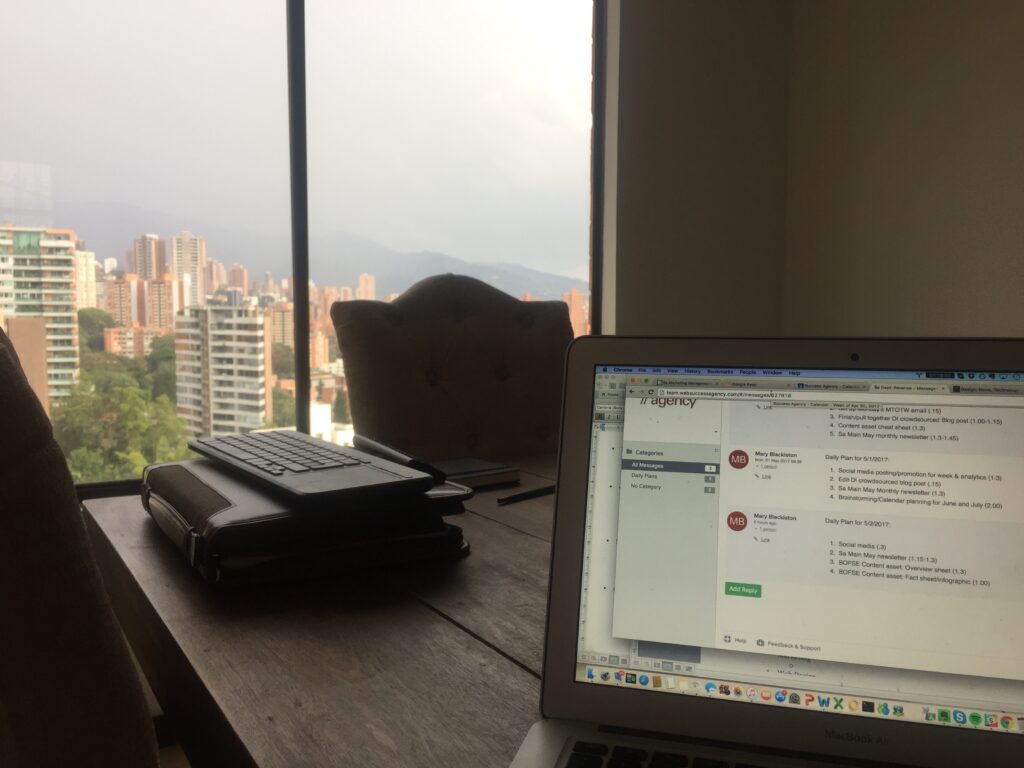
Even cafes can be a great way to meet people and network. Years ago, when I was working as a content marketer for a digital agency, I was working from a cafe in Medellin and this guy sitting next to me overheard my conversation with someone else.
He goes “you work in content marketing? I do too!” We started chatting and turns out, he was one of the founders of a well-known content marketing platform. This guy has over 300K followers on LinkedIn – so he’s a pretty big deal in the marketing world! I ended up going out with him and his friends later for dinner and drinks.
Moral of the story? Don’t be afraid to put yourself out there. You never know who you might meet!
If you want to travel with other people, you could also try a community that organizes group coliving trips around the world, like WifiTribe, NOMA Collective or Nomad Cruise.
Although personally, I’m not a fan of big digital nomad groups. Maybe I’m just more of a one-on-one person in general, but I’ve found some of the nomad groups can be quite cliquey. It also prevents you from meeting locals and integrating with the local culture.
Step 14: Don’t forget about taxes
The least fun step of all… taxes!
If you’re a US citizen, you’ll have to pay taxes in the US even if you don’t live there. BUT if you pay taxes elsewhere, you may be able to qualify for a Foreign Earned Income Exclusion (FEIE) which allows you to exclude a large amount of foreign-earned income from US taxation (up to $130K per year in 2025).
As a Spanish resident, I still pay U.S. taxes. I’m supposed to declare that same income in Spain and pay the difference, since Spanish taxes are higher.
In many other countries, you only have to pay taxes if you live there for 6+ months of the year — even if it’s your home country. I have a friend from Italy who doesn’t pay taxes anywhere because he just travels full-time. Lucky guy!
Putting it all into an action
Ok I know this blog post was long so if you read this far, congratulations! That tells me you’re really devoted to making this whole digital nomad thing happen.
Before you lose motivation (or let life get in the way), do this:
- Pick one location-independent career path from Step 1
- Spend the next 30 days learning and building that skill (even if it’s just 30–60 minutes a day — that adds up fast!)
- Once you feel confident, start applying to jobs and/or pitching (even if you feel underqualified… fake it till you make it!)
- Book a “test run” trip — 2–4 weeks somewhere easy, affordable, and nomad-friendly
If you want to get into copywriting, definitely check out my Nomad Copywriter Starter Kit. It’s the exact roadmap I wish I had when I was starting out as a digital nomad copywriter.
Inside, you’ll find out how I went from making $17/hour in a cubicle to making $200+ per hour working from cafés around the world.

hey, thanks for the shoutout to US Global Mail. We’d love to work with you and convert that link into an affiliate one so you can earn commissions. If that sounds good, please send us an email so we can invite you to our exclusive affiliate program. Thank you.